Warning
This guide is for Paprika 4, which is currently in beta. Switch to the Paprika 3 guide.
Paprika 4 (Beta) User Guide for macOS
Welcome to Paprika Recipe Manager!
This guide will introduce you to all of the features available within Paprika. You will learn how to add recipes to Paprika, browse for recipes online, create grocery lists, make meal plans, and more.
If after reading this guide you have any questions that have not been addressed, please consult our knowledge base.
Note
This user guide applies to Paprika 4 (Beta) for macOS. If you have an earlier version of Paprika, some of the features described in this user guide may not be available in your version.
Table of Contents
- Introduction
- What's New
- Beta Testing
- Overview
- Adding Recipes
- Scanning Recipes
- Browsing Recipes
- Editing Recipes
- Viewing Recipes
- Nutrition
- Categories
- Cookbooks
- Browser
- Groceries
- Pantry
- Meals
- Menus
- Sharing
- Settings
- Extensions
- Resources
What's New in Paprika 4
Paprika 4 is the biggest update we have ever released. It features a refreshed interface, new ways to add recipes, new ways to organize, and lots of little improvements throughout the app. This section summarizes what has changed since Paprika 3.
Note
Paprika is now free to download on all platforms, and you no longer have to purchase each version separately. All features are available for testing during the beta period. Afterwards, premium features will require a subscription to Paprika 4 Premium.
Highlights
Recipes
- Recipe scanning Premium - Choose a photo of a cookbook page or recipe card and let Paprika scan the recipe. See Scanning Recipes.
- Social media importing Premium - Save recipes from TikTok, Instagram, Facebook and YouTube. See Clipping Recipes from Social Media.
- Clipboard importing Premium - Copy text from an email, document, or message, and let Paprika extract the recipe. See Adding a Recipe from the Clipboard.
- Cookbooks Premium - Organize your recipe collection into cookbooks and share your cookbooks with other Paprika users. See Cookbooks.
- Advanced search - Search for recipes based on prep time, servings, rating, categories, etc. Combine rules to refine the results. See Advanced Search.
- Save your advanced searches for reuse. See Saved Searches. Premium
- Category suggestions Premium - Automatically suggest categories for a recipe based on its ingredients. See Suggesting Categories.
- Nutritional analysis Premium - Calculate a recipe's nutritional information using USDA ingredient data and display a nutrition label. See Nutrition.
- Duplicate finder - Find recipes you've saved more than once and clean them up in one step. See Find Duplicates.
Sharing
- Family sharing Premium - Invite family members to join your account. Each user gets their own login, and everyone shares the same recipes, grocery lists, meal plan, etc. See Family Sharing.
- Direct messaging Premium - Send your recipes directly to other Paprika users without having to email or export. See Messages.
Pantry
- Extra pantry locations Premium - Keep track of what's in the fridge, the freezer and the cupboard separately. See Pantry Locations.
- Barcode scanning Premium - Add items to the pantry by scanning their barcodes with Paprika (mobile versions only).
Meals
- Calendar feeds Premium - Subscribe to your meal plan in Apple Calendar, Google Calendar, Outlook or other calendar apps. See Calendar Feed.
Integrations
- Alexa integration Premium - Ask Alexa to add items to your grocery list, show your meal plan, or view recipes on your Echo Show (Alexa app required).
- macOS integrations - Use Paprika with Siri and Shortcuts, and search for recipes in Spotlight. See Shortcuts.
Other Changes
Recipes List
- Recipes can now be sorted by prep time, cook time, total time or number of servings (ascending or descending). See Sorting Recipes.
- When browsing recipes by category, right-click a recipe to remove it from that category.
- Move recipes between cookbooks by selecting them, right-clicking, and choosing Change Cookbook.
- Paprika remembers which categories you have expanded.
- Search options have been moved directly below the search bar so you can easily see the current options.
Recipe Screen
- The recipe screen now shows which cookbook a recipe belongs to.
- When nutrition has been calculated for a recipe, it will be displayed in a standard USDA nutrition label.
- The description, notes and nutrition sections can be collapsed.
- Right-click the recipe's source to copy its URL.
- Added a share button to the recipe's photo gallery. See Photo Gallery.
- Paprika can suggest ingredient substitutions if you are missing an ingredient for a recipe. (Requires Apple Intelligence.) See Ingredient Substitutions.
Recipe Editor
- Added Markdown-style headings and lists to the text formatting options, and
Command-Kinserts a link. See Inserting Recipe Text. - The category chooser now has a search bar and behaves more like tags.
- Added a cookbook chooser to change the cookbook a recipe belongs to.
- Each section of the recipe editor can be collapsed.
- Photos can be cropped and rotated during editing. See Adding Recipe Photos.
- The text editor can split a block of text into steps, number steps, remove stray bullet characters and summarize long text. (Requires Apple Intelligence.)
- For recipes without photos, you can generate a new photo using Image Playground. (Requires Apple Intelligence.) See Adding Recipe Photos.
- Recipes with existing nutritional information stored as text can have the information extracted to the table format for display in the nutrition label. See Nutrition.
Browser
- Improved recipe detection on websites, and downloading recipes is faster.
- Added a warning to the browser when downloading a recipe you already have.
- Added a share button to the browser.
- Added a setting to open links in the system browser instead of Paprika's browser.
- Added a search field to the bookmarks list.
See Browser.
Grocery Lists
- Added a share action to the grocery list that exports the current list to text.
- Added support for pasting a multi-line list of ingredients into the grocery list text box.
- Searching the grocery list now also matches item notes.
- When adding a recipe to the grocery list, Paprika checks the quantity you have in the pantry for each ingredient.
See Groceries.
Pantry
- Added support for pasting a multi-line list of ingredients into the pantry text box too.
- Added a notes field to pantry items. Notes are included when transferring to/from the grocery list.
- You can choose to include quantities when copying or moving items from the grocery list to the pantry.
- Items can be dragged between pantry locations.
- Items are automatically marked out of stock when the quantity is reduced to zero.
- Printed and emailed pantry lists show more information (in a table).
See Pantry.
Meals
- You can now add individual ingredients directly to the meal planner, which are included when adding your meal plan to your grocery list.
- You can now set the scale for recipes on the meal plan, so a recipe can be doubled for one day and halved for another. See Scaling Meals.
- Added a Today button to the date picker to jump back to the current day.
- The daily, weekly and monthly views stay in sync as you switch between them.
See Meals.
Menus
- Menus also support adding ingredients.
- Recipes added to menus can also have the scale set.
See Menus.
Sharing
- You can enable push notifications to be alerted when someone sends you a recipe or cookbook. See Push Notifications.
Import / Export
- Cookbook information is now included when importing and exporting Paprika files.
- You can also select a destination cookbook when importing recipe files from other apps.
See Import Recipes.
Settings
- Added a setting to change the app's startup screen.
- Added a setting to open links in the system browser.
- Added a setting to choose between showing the recipe's source or categories in the recipes list.
See List of Settings.
Account
- Account management has moved to the Account tab in Settings (formerly Cloud Sync).
- You can add a name to your account profile, which will be shown when sending recipe messages to other users.
- The login and signup screens now allow you to toggle password visibility.
See Account.
Performance
- Faster app startup.
- Scrolling through large recipe collections is smoother.
- Recipe searching, syncing, and bulk deletions are also faster.
Beta Testing
Thank you for helping us test Paprika 4! This section describes what we'd most like you to try during the beta, and how to send us your feedback.
Before You Start
- Sign up - If you haven't already, fill out our beta signup form to enable beta access for your Paprika account.
- Sync first - Before you install the beta, open Paprika 3 and let it finish syncing to ensure all of your data is uploaded to your Paprika account.
- Back up your recipes - We always recommend taking a backup of your recipes in the Paprika Recipe Format via
File -> Export…in the menu bar.
Note
- Paprika 4 replaces Paprika 3. Paprika 4 is designed as an in-place upgrade, therefore installing Paprika 4 will replace Paprika 3 on your device. If you still need Paprika 3, we recommend installing Paprika 4 on a secondary Mac instead.
- Your data will be preserved when you upgrade.
- Paprika 4 is backwards compatible and capable of syncing with earlier versions of Paprika.
- You can leave the beta and reinstall Paprika 3 by going to TestFlight and pressing
Stop Testing.
What to Test
Use Paprika 4 the way you normally would: add new recipes, plan your meals, shop from your grocery list, and cook with your recipes. Most of all, we'd like to hear about anything that is broken, confusing, or slower than it was in Paprika 3. Along the way, please try these in particular.
Adding Recipes
- Recipe scanning - Scan cookbook pages and recipe cards, including handwritten cards, recipes set in two columns, and recipes that run across two pages.
- Social media importing - Save recipes from TikTok, Instagram, Facebook and YouTube posts.
- Clipboard importing - Copy a recipe from an email or a document and add it from the clipboard.
When submitting feedback regarding any of these new import features, it would be very helpful if you provided the source photo, social media post, or text content that you attempted to import.
Organizing
- Cookbooks - Create cookbooks, move recipes between them, and share a cookbook with another Paprika user.
- Advanced search - Build searches from several rules, and keep the ones you use as saved searches. See Advanced Search.
- Category suggestions - Let Paprika suggest categories for recipes that have none.
- Duplicates - Find duplicate recipes, and check that the ones it matches really are duplicates.
Nutrition
- Ingredient analysis - Analyze a recipe's ingredients and compare the results with a recipe whose nutrition you already know.
Sharing
- Family sharing - Invite a family member, then both make changes and check that you each see the other's.
- Messages - Send a recipe to another Paprika user, and import one sent to you.
Pantry
- Pantry locations - Split your pantry into locations such as the fridge and the freezer.
Meals
- Calendar feed - Subscribe to your meal plan in your calendar app, then plan and move a few meals and check that the calendar follows.
Integrations
- Mac integrations - Save a recipe from Safari with the share extension, and try Paprika with Siri and Shortcuts.
Sending Feedback
Through TestFlight
Open the TestFlight app, select Paprika, and click Send Beta Feedback. Add a note describing the problem, and attach a screenshot if it helps show what you saw.
If Paprika crashes, TestFlight asks whether you'd like to send a crash report. Please do, and add a note about what you were doing when it happened.
Direct Feedback
For a longer report, or to attach files, you can also submit a request through our support page using the Beta Feedback category. Please include:
- The version of Paprika 4 you are running, shown under
Paprika -> About Paprikain the menu bar. - Your Mac model and macOS version.
- Screenshots, if they help show what you saw.
Overview
Paprika is divided into seven main sections, each of which is accessible by clicking the corresponding section in the main menu on the screen.
Shortcut You can also press Command-1 through Command-7 to access that ordered section of the app. For instance, Command-5 will navigate you to the meals section.
| Tab | Description |
|---|---|
| Recipes | This is the main screen of the application, and contains your recipe collection. From here you can open individual recipes, search for recipes, and view recipes by category. |
| Browser | The built-in web browser allows you to browse for recipes online, and clip your favorite recipes into Paprika. |
| Groceries | This shows your current grocery lists. From here you can check off grocery items as you shop, edit your grocery lists, and add custom grocery list items. |
| Pantry | The pantry section keeps track of common ingredients you may have at home. In this section you can add custom pantry items, change expiration dates and purchased dates, and more. |
| Meals | This is Paprika's meal planner. You can use it to create weekly and monthly meal plans, and view your daily meal schedule. |
| Menus | The menus section allows you to create reusable menus from your favorite meal plans. |
| Sharing | The sharing section is where you manage your family sharing and your in-app messages — sending recipes to other Paprika users, and importing the recipes they send you. |
The left sidebar also displays your pinned recipes and active timers, along with an button, and a button at the top. If you are logged into a Paprika account, your account email and the time of your last sync are displayed at the bottom of the sidebar.
Note
Paprika 4 features a completely redesigned interface, and supports both light and dark appearances. Paprika follows your system appearance.
Note
When you quit and relaunch Paprika, it will reopen to the section, search, or recipe you were last viewing. If you would prefer Paprika to always open to a specific section, you can choose a startup screen in the Settings panel.
Adding Recipes
There are several ways to add recipes to Paprika:
- Type it in - Press the button and fill in the recipe yourself. See Adding a Recipe.
- Paste it from the clipboard Premium - Copy recipe text from an email, a document or a message, and Paprika sorts it into a new recipe. See Adding a Recipe from the Clipboard.
- Scan it Premium - Choose a photo of a cookbook page or recipe card, and Paprika reads the recipe from it. See Scanning Recipes.
- Download it from a website - Find a recipe in Paprika's built-in browser and press . See Clipping Recipes Online.
- Copy it from a website yourself - For a site Paprika can't read on its own, use the browser's clipboard tools to copy each part of the recipe into place. See Manually Saving Recipes Using the Clipboard Tools.
- Save it from social media Premium - Save a recipe from a TikTok, Instagram, Facebook or YouTube post. See Clipping Recipes from Social Media.
- Share it from Safari - Press the button in Safari and choose Paprika. See Saving Recipes from Safari.
- Receive it from another Paprika user - Recipes and cookbooks other Paprika users send you arrive in your Messages inbox. See Receiving & Importing Recipes.
- Import it from another app - Paprika can import recipes exported from other recipe apps. See Import Recipes.
Adding a Recipe
- Click in the upper right corner of the recipes screen.
- Choose how to start:
- From Scratch - Opens an empty recipe form.
- From Clipboard - Turns recipe text you've copied into a new recipe. Dimmed when there's no text on the clipboard. See Adding a Recipe from the Clipboard.
- Scan Recipe - Creates a recipe from photos of a cookbook page or recipe card. See Scanning Recipes.
- Fill in the fields you want, and pick a
cookbookfrom the cookbook popup. See Recipe Fields. - Click in the lower right corner, or in the lower left to discard.
The description, notes and nutrition boxes start out hidden; click a header to show one. To add photos, click the photo thumbnail on the left of the form. See Adding Recipe Photos.
The menu bar has the same options under File -> New Recipe, where scanning is called From Photos.
Shortcut Press Command-N on the recipes screen to open the menu, and Command-S to save.
Adding a Recipe from the Clipboard Premium
Copy recipe text from an email, a document or a website, then:
- Click in the upper right corner of the recipes screen and choose
From Clipboard, or chooseFile -> New Recipe -> From Clipboard. - Check the preview and click . Paprika sorts the text into the recipe fields.
- Review the filled-in form, then click .
Scanning Recipes
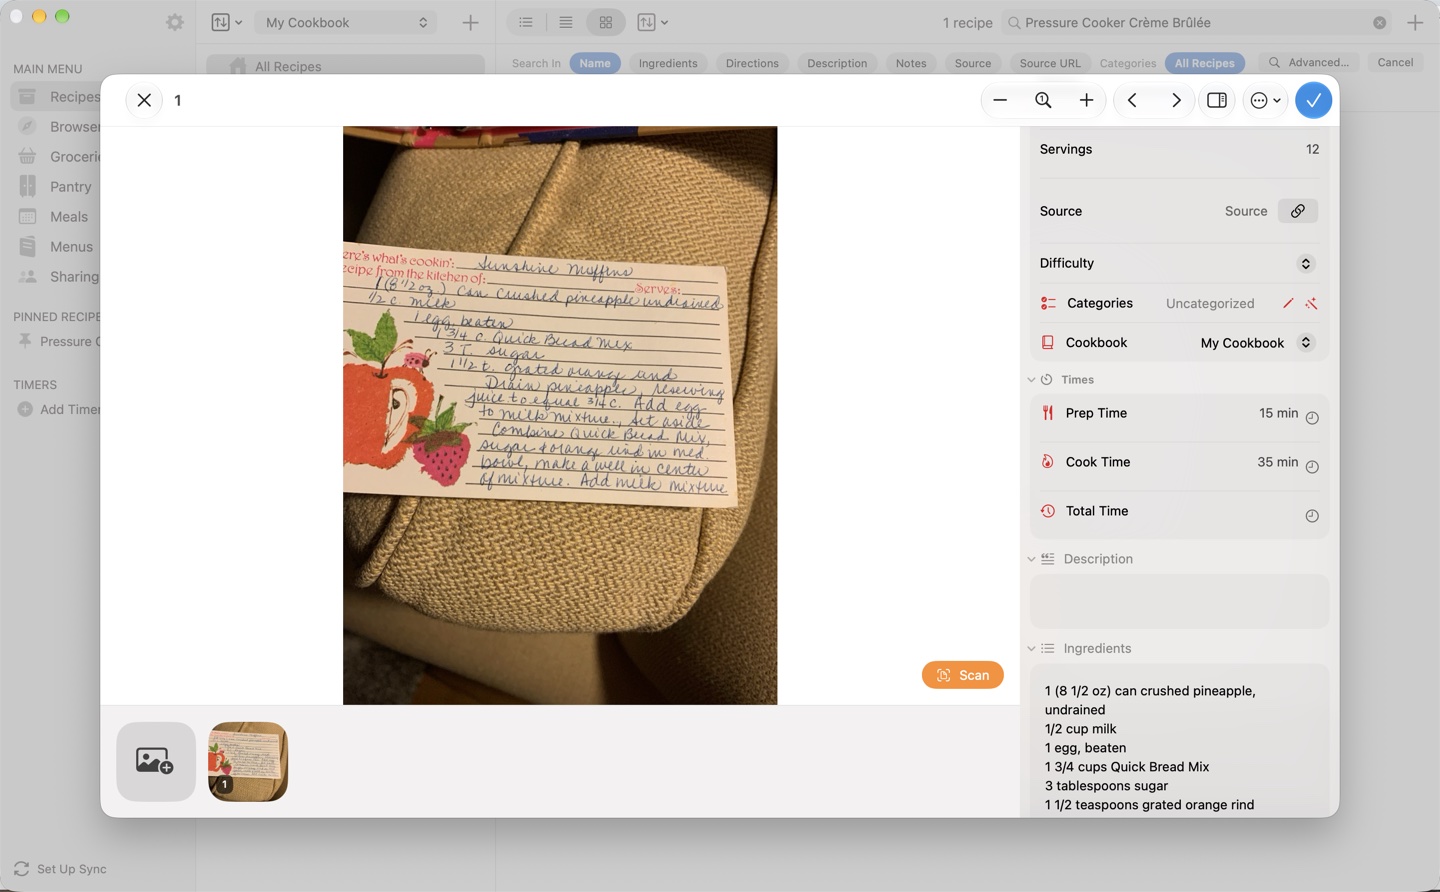
- button Scanning a Recipe
- Add photo Scanning a Recipe
- Recipe fields Editing a Scanned Recipe
- Save button Editing a Scanned Recipe
Paprika can turn photos of recipes into structured recipes in your collection. Snap a photo of a cookbook page, a magazine clipping, or a handwritten recipe card, and Paprika will read the text and sort it into the appropriate recipe fields for you.
Scanning a Recipe Premium
From the recipes list, press the button to add a new recipe, then select Scan Recipe to choose one or more images from your Mac. (You can also go to File -> New Recipe -> From Photos in the menu bar.)
A recipe can span multiple photos — for example, a page of ingredients and a page of directions. Add all of the photos to a single scan and Paprika will combine them into one recipe. You can also import a PDF of a recipe.
Crop each photo so that only the recipe text is included. To crop or rotate a photo before scanning, open the … (More) menu and choose Edit. Use the rotate and crop buttons, then press Done. When you're ready, press . Paprika will process the photos and present the recognized recipe for review.
Editing a Scanned Recipe
After scanning, the recognized text is sorted into the recipe's fields — name, ingredients, directions, and so on — and displayed alongside the original photo. Compare the result against the photo, correct anything the scan missed, and press to add the recipe to your collection.
Shortcut To copy text straight from the photo, choose Select Text from the … menu, then select the text and copy it into a recipe field. This is handy for fixing up any sections the scan placed incorrectly. Select Text needs macOS 26 or later.
To remove a photo from the scan, right-click its thumbnail and choose Delete. To start over, choose Reset from the … menu. This clears the recipe's text and details, but your photos stay.
Scanning Tips
- For best scan quality, pick a high-resolution image with clear, readable text.
- Make sure the page is evenly lit and the text isn't distorted by the curve of the page.
- Crop out surrounding text (like other recipes on the same page) so only one recipe is scanned at a time.
Note
Scanning sends your photos to Paprika's servers for text recognition. When Paprika can't read a photo the usual way, for example when you're offline, it reads the text with a simpler method instead. A notice then asks you to check fractions, quantities, and multi-column layouts, and tries the photo once more.
Browsing Recipes
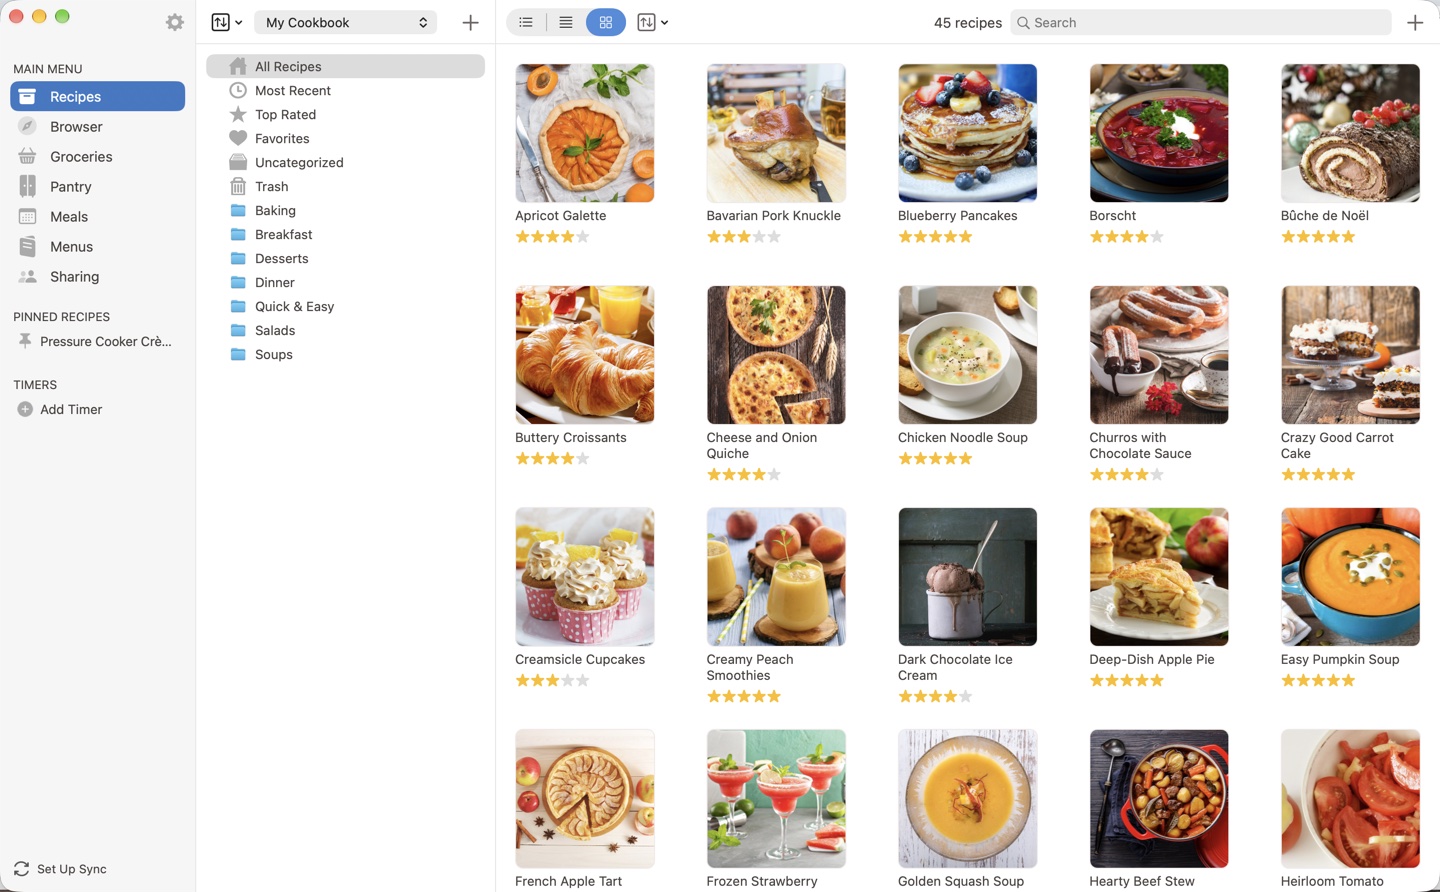
- View toggle Browsing Recipes
- Categories Browsing by Category
- Search bar Searching Recipes
- button Sorting Recipes
- button Adding a Recipe
- Timers Timers
- Pinned recipes Pinning Recipes
- above the categories Adding a Category
All of your recipes are displayed on the recipes screen. The left pane displays the list of recipe categories, while the right pane shows the recipes themselves.
Note
You can change the recipe view to display recipes in a condensed list or a photo grid view by using the toggle control in the toolbar.
Note
The recipes displayed belong to the currently selected cookbook. See Cookbooks for details on switching between cookbooks.
Browsing by Category
All Recipes is the default selected category, which displays all of your recipes in alphabetical order. If you would like to change the selected category, simply click on a new category to highlight it.
Browsing Subcategories
Categories that have subcategories will have an expansion triangle displayed next to them. Click the triangle in order to reveal or hide the subcategories.
Searching Recipes
The recipes screen contains a search field in the upper right of the window. Click it, or press Command-F, and start typing, and your recipes listing will be filtered as you type.
Paprika looks for each word you type separately, and shows the recipes that contain all of them. For example, chicken spinach finds recipes that mention both chicken and spinach, in any order. A word can match part of a longer word, and capitals and accents don't matter.
Note
Separate your search words with spaces, not commas.
While searching, the options above the results change what's searched:
Search In- The fields to search:Name,Ingredients,Directions,Description,Notes,Source, andSource URL. OnlyNameis selected at first, and Paprika remembers your choice for your next search.Categories- Limit the search to one or more categories, or toFavorites,Uncategorized, or theTrash. Choosing a category includes its subcategories. When you choose two or more, chooseAllto find recipes in every one of them, orAnyto find recipes in at least one.Cookbooks- Search one cookbook, several, orAll Cookbooks. When a search covers more than one cookbook, the category list has a section for each cookbook.
A search starts in the cookbook and category you're browsing. To search your whole collection, choose All Recipes under Categories and All Cookbooks under Cookbooks. Click at the end of the search options to end the search.
Advanced Search
The advanced search editor finds recipes by almost anything about them, such as recipes under 30 minutes, recipes rated four stars or more, or recipes without a photo. To open it while searching, click at the end of the search options. The editor starts with your current search.
An advanced search is made of rules. Each rule picks a field, a condition, and a value:
| Fields | Conditions |
|---|---|
| Name, Ingredients, Directions, Notes, Description, Source, Source URL, Nutrition | contains, does not contain, is, is not, begins with, ends with, is empty, is not empty. One rule can look in several of these fields at once. |
| Prep Time, Cook Time, Total Time (in minutes), Servings, Rating | is, is not, is greater than, is at least, is less than, is at most, is between. |
| Difficulty | is, is not. |
| On Favorites, Is Pinned, In Trash | Yes or no. |
| Categories | includes any of, includes all of, excludes, is Uncategorized. |
| Cookbook | is any of, is none of. |
| Thumbnail, Attached Photos | Whether the recipe has a thumbnail, and whether it has attached photos and they've been downloaded. |
At the top of the rules, choose whether recipes must match all or any of them. Click the button to add a rule, or choose Add Group to add a group of rules with its own all or any choice. Click the button to remove a rule or group. Under Sort, you can choose how the results are sorted.
When you're done, click . The search options are replaced by a summary of what you're searching for. To change the search, click .
Note
In an advanced search, the words in a text rule are matched as a single phrase. The first time you search by time or servings, Paprika needs a moment to index your recipes, and a notice says the results may be incomplete until it's done.
Saved Searches Premium
You can save an advanced search to run again later. In the advanced search editor, click Save Current Search, enter a name, and click . Saved searches sync to all of your devices.
To run a saved search, open the advanced search editor and click the search under Saved Searches, then click . This replaces the search in the editor. Click to run it.
To change a saved search, load it, make your changes, and click Update Saved Search. The editor lists your first five saved searches. Click Show All… to see the rest, where you can right-click a search to Rename or Delete it.
Sorting Recipes
You can sort recipes by clicking the button in the top toolbar.
Choose the field you would like to sort by: Name, Rating, Most Recent, Prep Time, Cook Time, Total Time, or Servings. Then choose Ascending or Descending.
Editing Recipes
Editing a Recipe
Click in the upper right corner of the recipe screen, or right-click a recipe in the list and choose Edit. The recipe opens in the same form you use to add one.
Shortcut Press Command-E on the recipe screen.
Note
If you close the form with unsaved changes, Paprika shows a Discard Changes confirmation first.
Deleting Recipes
There are several ways to delete a recipe:
From the recipes list:
- Right-click the recipe to reveal the context menu, and then press .
- From the condensed recipe list, select one (or more) recipes in the list, and then press on your keyboard.
From the recipe screen:
- Press the button to reveal the recipe actions menu, and then press .
Shortcut In the condensed list or the photo grid, choose Edit -> Select All or press Command-A to select every recipe in the current list before performing a bulk action.
Note
Deleted recipes will go into the Trash and be displayed in that section of your categories list. To permanently delete the recipe, go to the trash category on the main recipes view and click . To undo the deletion, right-click on the recipe and choose the Undo Delete action. Only recipes go into the trash: all other items (meals, groceries, etc) are deleted immediately when you select them for deletion.
Recipe Fields
These are the fields that you can enter when you create or edit a recipe:
| Field | Description |
|---|---|
| Name | The name of the recipe. |
| Difficulty | The difficulty of the recipe, from Easy to Hard. Custom values may also be entered. |
| Servings | The number of servings this recipe makes. |
| Prep Time | The amount of preparation time this recipe requires. |
| Cook Time | The amount of cooking time this recipe requires. |
| Total Time | The total amount of time this recipe requires. Tip Type any time you like, such as overnight, or click the clock button (Choose Time) beside a time field to pick the hours and minutes. |
| Rating | A star rating from 0 to 5 for this recipe. |
| Categories | The categories this recipe belongs to. |
| Source | Where this recipe came from. Grandma, Serious Eats, etc. |
| Source URL | This is an optional field that records the original URL of the recipe if it came from a website. |
| Description | A short introduction of the recipe, displayed above the directions. |
| Notes | Any cooking notes you would like to include with the recipe. Displayed below the directions. |
| Nutrition | Nutrition notes, a Nutrition Facts table, or both. Displayed below the ingredients. See Nutrition. |
| Ingredients | The ingredients required for this recipe. Note Create ingredient headings by ending them with a colon (e.g. Sauce:). |
| Directions | The directions for this recipe. |
| Photos | An optional thumbnail and one or more higher-resolution images. You can select files from the filesystem or from the clipboard. |
Inserting Recipe Text
You can add formatting and images to the description, ingredients, directions, nutrition and notes fields.
When you click in one of those fields, a row of formatting buttons appears in the field's heading. Hold the pointer over a button to see its name:
Bold,Italic,Heading,Bulleted List, andNumbered List, which format the selected text or lines.Add Link,Add Photo, andChoose Recipe, which insert a website link, a photo, or a link to another recipe.
The wand button at the end of the row holds the text cleanup tools for that field, handy for tidying up pasted or clipped text:
- Directions -
Split into Steps,Number Steps, andRemove Leading Bullets. - Ingredients -
Number StepsandRemove Leading Bullets. - Description and Notes -
Summarize,Split into Steps, andRemove Leading Bullets.
The Nutrition heading has less room, so it has a single Format menu (the Aa button) instead, holding the same commands and Remove Leading Bullets. It appears while the nutrition box shows Text. The recipe form beside the browser and the scanned photos also uses a Format menu for each field in place of the row.
The same commands appear when you right-click the text. You can also press Cmd-B for bold, Cmd-I for italics, and Cmd-K to add a link.
Note
Split into Steps and Summarize use Apple Intelligence, and only appear on a Mac where it is available.
If you prefer to type the formatting yourself, you can hide the formatting buttons with the Show Text Formatting Buttons setting in the Settings panel. Right-clicking and the keyboard shortcuts still work.
Note
When you press Enter at the end of a list item, Paprika automatically continues the list on the next line. Press Enter on an empty list item to end the list.
Paprika uses a modified form of Markdown for formatting:
| Format | Syntax | Instructions |
|---|---|---|
| Bold | **bold** or __bold__ |
Surround words with two asterisks or two underscores. |
| Italic | *italics* or _italics_ |
Surround words with one asterisk or one underscore. |
| Links | [Google](https://www.google.com) |
Put the title in brackets and the URL in parentheses. Only the title is displayed. |
| Photos | [photo:Mixing the Batter] |
Put the name of one of the recipe's photos in brackets, after photo:. A thumbnail is displayed; click it to see the full size image in the photo gallery. |
| Recipes | [recipe:Brussels Sprouts with Pancetta] |
Put the name of another recipe in brackets, after recipe:. Click the link to open that recipe. |
| Headings | # Sauce |
Start a line with # and a space. Use ## to ###### for smaller headings. |
| Unordered List | - Preheat the oven |
Start each line with a dash and a space. |
| Ordered List | 1. Preheat the oven |
Start each line with a number, a period and a space. |
A heading or a list has to start its own paragraph: leave a blank line before it when it follows other text.
The link button in the toolbar opens a dialog where you can enter the title and URL without typing the syntax yourself. Photo embeds work in the directions as well, so you can illustrate individual steps.
Paprika looks up photos and recipes based on name; if multiple recipes exist with the same name, a picker will appear when you click the link and allow you to choose the recipe. If multiple photos exist with the same name, the first will be selected. If the recipe or photo name changes, links will need to be updated.
Shortcut Keyboard shortcuts work while editing: Command-B for bold, Command-I for italics, and Command-K to add a link. They're also in the Edit menu as Bold, Italic, and Add Link. Headings and lists have no keyboard shortcut.
Adding Recipe Photos
You can add multiple photos to a recipe. Each photo can be up to 20 MB in size, and photos are synced with your cloud data. When you save the recipe, Paprika scales larger photos down to 3096 pixels on their longest side.
From the edit recipe form, click the photo thumbnail to open the Photos sheet, which lists all photos associated with the recipe. To add a photo, click the button. The Add Photos sheet offers four sources:
- Photos - Browse your Photos library.
- Files - Import an image file from disk.
- Clipboard - Paste an image you have copied to the clipboard.
- Generate - Create an image for the recipe with Image Playground, using Apple Intelligence.
You can also drag photos in from other apps.
Each photo displays its name, file size, and pixel dimensions below the thumbnailed image, along with an action menu where you can delete the photo or set it as the current thumbnail. To delete several photos at once, select them in the list and delete them together.
The photo name is used to identify the photo when embedding it in text, and will also be displayed at the top of the photo gallery. To rename a photo, choose Edit Photo from its action menu.
The thumbnail does not need to be one of the associated photos in the gallery. Deleting the thumbnail will not affect existing recipe photos, and you can use any photo's action menu to make it the new thumbnail.
Drag to reorder photos and change their position in the photo gallery.
Note
Photos will be uploaded to the cloud immediately but downloaded on demand by other devices (to save space). Photos associated with a recipe are downloaded when that recipe is opened. You can also download an individual photo to your Mac by choosing Download from the photo's action menu, which offers it while the photo hasn't been downloaded yet.
Viewing Recipes
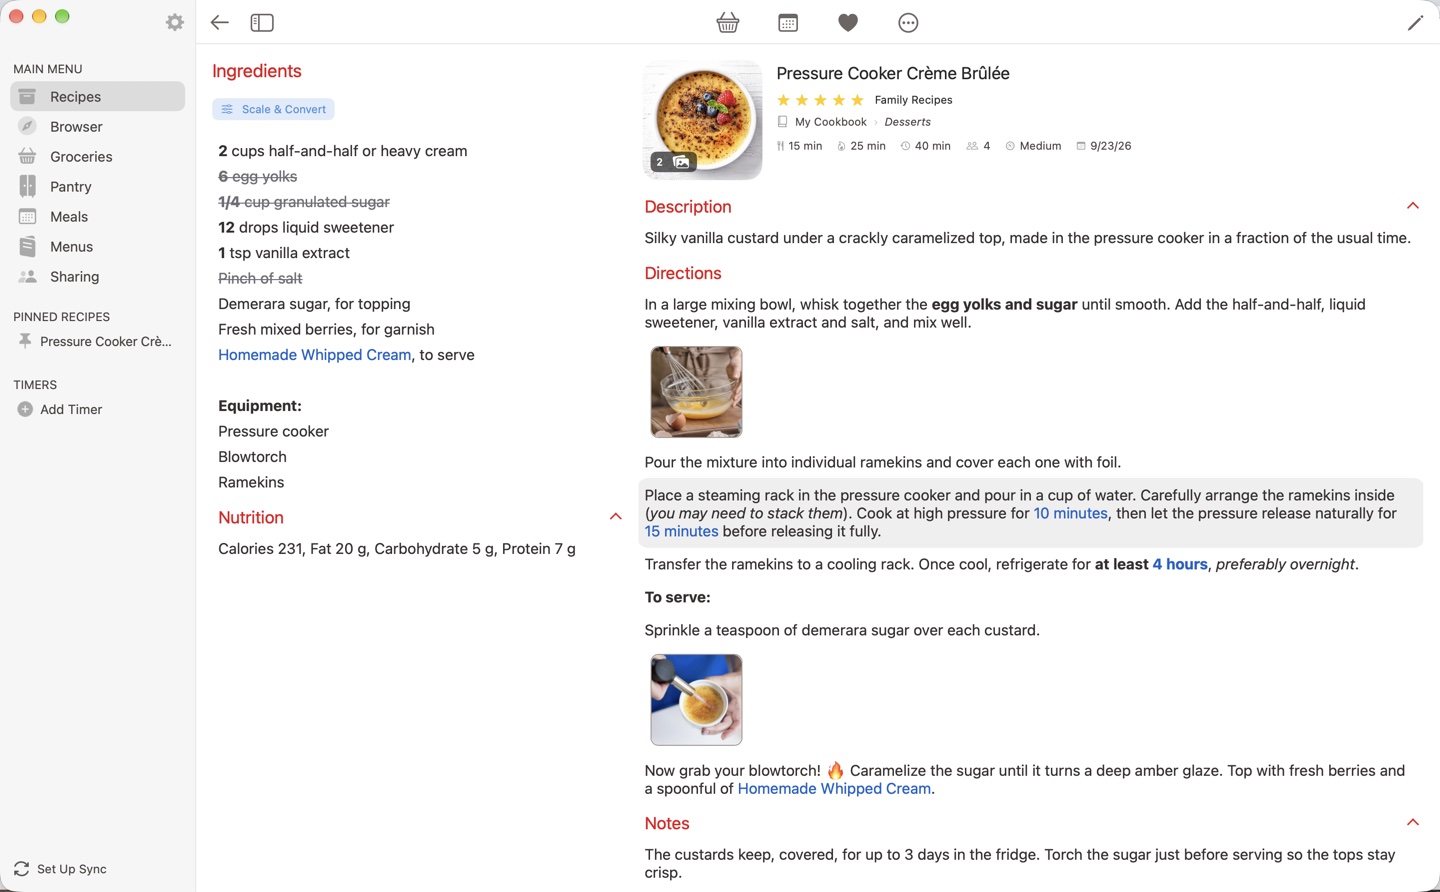
- Recipe toolbar Recipe Actions
- button Editing a Recipe
- Photo Photo Gallery
- Scale Scaling & Converting Ingredients
- Crossed-off ingredient Crossing off Ingredients
- Timer link in a direction Timers
- Pinned recipes Pinning Recipes
- Sidebar toggle Recipes Sidebar
From the recipes screen, click on a single recipe in the listing in order to open the recipe. If in the cell or photo view, you will need to double click. You can also right-click on the recipe and choose .
This is the main recipe view. The ingredients are displayed on the left, information about the recipe is displayed near the top, and the directions are displayed to the right. The description will be displayed above the directions and the notes will be displayed below the directions. Any nutritional information, including a Nutrition Facts label, will appear below the ingredients. The recipe's cookbook is displayed in the header along with its categories.
Note
The description, notes, and nutritional information sections are collapsible. Click a section's header to show or hide its contents.
Note
If the recipe has a source URL, the source will be highlighted in bold. You can click on the source to load the original source URL in the browser. If you prefer recipe links to open in your default web browser instead of Paprika's built-in browser, you can change this in the Settings panel.
Recipe Actions
The top toolbar contains several actions you can perform with the recipe:
| Action | Description |
|---|---|
| Add to Meal Planner | You can add a recipe to the meal planner using this button. Select the date and type of meal you would like to add this recipe to, and then press . |
| Add to Grocery List | Add this recipe to the grocery list. You'll be asked to choose ingredients and grocery list first. |
| Add to Favorites | Add this recipe to your favorites. Click the heart again to remove it from your favorites. |
Less common actions are placed under the button to the right of the other buttons.
| Action | Description |
|---|---|
| Open Recipe in New Window | Allows you to open the recipe in a new window. This is useful if you want to copy and paste more info into a recipe while using the browser, or view several recipes at once. |
| Print the contents of this recipe. | |
| Send to Paprika User… | Send this recipe to another Paprika user as an in-app message. See Sending Recipes & Cookbooks for details. |
Email recipients can import the recipe into their copy of Paprika by clicking the .paprikarecipes attachment. You can email to multiple recipients by separating the email addresses with commas. When emailing a single recipe, the recipe will also be displayed as text/HTML in the body of the email. |
|
| Duplicate | Makes a copy of the recipe and then enters edit mode. Good when trying out recipe variations. |
| Pin Recipe | Pins the recipe to the sidebar. Recipe pins will be synced across devices. |
| Ingredient Substitutions | Suggests substitutes for ingredients you don't have. Needs Apple Intelligence. See Ingredient Substitutions. |
| Share | A submenu with Source Link (when the recipe has a source URL), Paprika File and Recipe Text. Each lists the ways your Mac can share it, such as AirDrop, Messages or Mail. A Paprika file can be imported into another copy of Paprika. |
| Export… | Exports the recipe to HTML or to the paprikarecipes format. |
| Delete | Moves the recipe to the Trash category. |
Printing Recipes
As described above, printing is accessed via the button in the recipe toolbar. Paprika 4 offers an expanded set of options you can configure for printing:
The options are grouped under Print Options, Card Options, Recipe Options, and Photo Options. Options that don't apply to your choices are turned off. When you're ready, click to open the print dialog.
| Option | Description |
|---|---|
| Page Type | Allows you to change the type of page the recipe prints on. Options available are: Full Page, Index Cards, and Index Card Sheets. Index Cards will print to physical index cards, while Index Card Sheets is meant for printing several index cards on full page paper and then cutting them out. |
| Paper Size | Choose the paper size to print on: US Letter, US Legal, A4, A5, or A6. |
| Orientation | Portrait (taller than wide) or Landscape (wider than tall). |
| Font Size | Allows you to change the font size of the printed recipe. |
| Page Margins | Allows you to adjust the printer margins. Measurements are given in inches. |
| Card Size | Allows you to change the size of the index card. Options are given in inches. |
| Card Margins | Allows you to adjust the inner margin of the index card. Measurements are given in inches. |
| Divider | When printing several recipes, choose Page Break to start each recipe on a new page, or Line to separate them with a line. |
| Layout | One Column prints everything in a single vertical column. Two Columns prints the ingredients and directions side by side, and Two Columns (Wrap) lets the directions wrap under the ingredients once they end. |
| Show Info | Whether or not the recipe metadata, such as prep and cook times, should be printed. |
| Show Notes | Whether or not the recipe notes should be printed. |
| Show Nutrition | Whether or not the recipe's Nutrition Facts label and nutrition notes should be printed. |
| Show Photos | Thumbnail Only prints the recipe photo, All Photos also prints the photos embedded in the recipe text, and None prints no photos. Useful if you want to save ink. |
| Thumbnail Size | How large the recipe photo prints: Small, Medium, or Large. |
| Thumbnail Position | Whether the recipe photo prints on the Left or the Right. |
| Photo Size | With All Photos, how large the embedded photos print, from Small to Full. |
You can also print several recipes at once: select multiple recipes in the recipes list, then right-click and choose .
Note
Printed recipes follow your measurement system, and if you have scaled a recipe, the printout will show the scaled servings.
Timers
Timers are automatically detected in your recipe's directions and highlighted in blue. In order to start a timer, simply click on the highlighted time and press . The timer countdown will appear in the left sidebar.
Viewing timers - All of your active timers are displayed in the left sidebar.
Adding a timer manually - From the left sidebar, click the button. You can choose a name for the timer. Once you have selected a time, press to begin the timer.
Removing timers - Timers are automatically removed once they have elapsed. If you would like to manually remove a timer: you can either right-click on it and choose Delete, or click on the timer itself and press .
Editing timers - To change the name or time of a timer, click on the timer in the timers list and press . You can also pause, resume and cancel the timer from this popup, and see the remaining duration of the timer.
Note
Timers can be set for up to 99 hours.
Scaling & Converting Ingredients
Scaling - You can scale the ingredients of a recipe by clicking on the button next to the Ingredients heading.
When the ingredients scaling popover appears, select the amount you'd like to scale the ingredients by and they will change automatically. The scale button will update to display the current recipe scale.
The amount to scale can be entered as a whole number, decimal, or fraction (ex: 3, 0.25, 1/3).
If you add a scaled recipe to the grocery list, the grocery list items will preserve the ingredients scaling.
Note
Paprika anticipates this ingredient format: quantity unit ingredient, i.e. 1 cup milk. For best results, ensure your ingredients are entered in this format.
Converting - You can convert ingredients units from standard (US) units to metric or reset them to their original units by using the Units picker in the same popover.
Crossing off Ingredients
When you are cooking, you may find it useful to cross off ingredients once you have used them. Simply click the desired ingredient in order to cross it off. (Click again to un-cross it.)
Marking Directions
You can also highlight the current step of your directions by clicking on it to help keep your place.
Ingredient Substitutions
Missing an ingredient? Click the button in the recipe toolbar, or right-click a single recipe in the recipes list, and choose Ingredient Substitutions. A window lists the recipe's ingredients. Click one you don't have, and Paprika suggests one or two substitutes, each with an adjusted amount where one is needed and a short reason it works in this recipe. Click the ingredient again to clear it.
Note
Ingredient Substitutions is free. It uses Apple Intelligence, so it needs macOS 26 or later with Apple Intelligence turned on in System Settings; otherwise the action doesn't appear.
Pinning Recipes
You can pin active recipes to easily switch between them while you are cooking. To pin a recipe, click the button in the recipe toolbar, and choose .
Your pinned recipes will be displayed in the left sidebar. Click on any of these recipes to switch to them. When a recipe is pinned, Paprika will keep track of the ingredients you have crossed off and the current directions you have highlighted, so you don't lose your place.
When you're done cooking, hover over the pinned recipe in the list and click the to un-pin the recipe.
Note
From the main recipes list, you can also pin recipes by dragging and dropping them into the left sidebar.
Recipes Sidebar
Click the rectangular button next to the back button in the upper toolbar to show or hide a condensed list of recipes and easily search and switch between them.
Photo Gallery
If there are photos associated with the recipe, you can click the thumbnail to display the photo gallery. The photo gallery contains an ordered list of photos with names displayed at the top.
You can scroll the photos by pressing the left and right arrow buttons which appear when you hover over the image, or using the arrow keys on your keyboard, or swiping with two fingers on your trackpad.
You can close the photo gallery by pressing the key on your keyboard or clicking the button in the upper left hand corner of the toolbar.
To share the photo you're looking at, click the share button (a square with an arrow) in the upper right corner of the gallery, and choose one of the ways your Mac can share it, such as AirDrop, Messages or Mail. The button appears once the photo has been downloaded.
Note
When downloading recipes via the browser, only a link to the online photo is saved unless you explicitly add photos to the recipe using the context menu or by dragging photos into the edit photos screen. In the case that the thumbnail references a linked photo, clicking the thumbnail will load the photo from the internet and display it.
Tip If both a photo link and recipe photos exist, the photo gallery will load and the link button in the upper right corner of the gallery can be used to load the linked source image from the website.
Gestures & Keyboard Shortcuts
| Navigate Back | Press ESC. Also exits the photo gallery. |
| Edit Recipe | Press Command-E. |
| Save Recipe | Press Command-S from the edit screen. |
Nutrition
A recipe can hold two kinds of nutrition information: nutrition notes you type yourself, and a Nutrition Facts table like the label on packaged food. Paprika can fill in the table for you by analyzing the recipe's ingredients.
Entering Nutrition Facts
While editing a recipe, click the Nutrition header to open the pane. The Text | Table control in the header switches between the two kinds of nutrition information. Paprika saves both, so a recipe can have notes and a table.
- Text holds your nutrition notes. You can format them like the other text fields.
- Table holds the Nutrition Facts:
Servings,Serving Size,Serving Weightin grams, and the amount per serving of each nutrient on the label, fromCaloriesdown toPotassium. Use the arrows besideServingsto change the servings, which start at the recipe's own.
If your notes already list values such as "Calories: 250", click in the Nutrition header to copy them into the table.
Analyzing Ingredients Premium
Paprika can calculate the Nutrition Facts from the recipe's ingredients. It matches each ingredient to a food in the USDA nutrition database and works out its weight from the amount in the recipe.
To analyze a recipe, click in the Nutrition header. Paprika lists each ingredient with the food it matched. An ingredient may also show:
No USDA Match- Paprika couldn't find a matching food.No Ingredient Detected- the line isn't an ingredient, such as a heading.Not counted- the ingredient is left out of the totals.
Click an ingredient to open Edit Ingredient, where you can:
- Correct the
QuantityandMeasurementthat Paprika read. - Choose a different food under
USDA Mapping. ClickChoose…and search for the food inFind Food. - Turn on
Exclude from calculationfor an ingredient you won't use. When a line offers a choice, such as "butter or margarine", Paprika counts only one of them.
Click to return to the list. When the list looks right, click . If some ingredients have no usable match, Paprika warns you with Unmatched Ingredients. Choose Calculate Anyway to leave them out, or Cancel to go back and fix them.
The Nutrition Facts screen shows the calculated amounts per serving. Change the servings to recalculate the amounts, or edit any value directly. If the recipe gives no amount for an ingredient, such as "salt to taste", a note lists what the totals leave out. Click to copy the values into the recipe's table.
Note
The results of ingredient analysis are estimates. Paprika remembers your changes in the analysis while you edit the recipe, so you can close it and come back.
Viewing Nutrition
When a recipe has Nutrition Facts, the recipe view shows them as a label in the Nutrition section, with the servings per recipe, the serving size, calories, and each nutrient's percent daily value. If the recipe also has nutrition notes, use the Table | Text switch above the label to see either one.
To print nutrition information, turn on Show Nutrition in the print options. The printout includes both the Nutrition Facts label and your notes.
Categories
Paprika allows you to organize recipes into categories to make them easier to manage.
Note
Each cookbook has its own set of categories.
Assign a Recipe to a Category
To edit a recipe's categories, navigate into the recipe and press the button in order to edit the recipe. The Categories row in the edit form has two buttons: an edit button that opens the category picker, and a wand button that suggests categories for the recipe.
The edit button opens the Choose Categories dialog. Uncategorized is listed at the top, followed by your full category hierarchy shown pre-expanded, with a selection circle next to each category. Select one (or more) categories to associate them with the recipe. You can type into the Search or Add Category field at the top to quickly filter the list. Press the button when you are done.
Shortcut You can create a new category right from the picker: type its name into the Search or Add Category field and press Return. When no category matches, you can also click the Add "name" row. The new category is added at the top level and selected for the recipe.
Shortcut From the main recipes listing, you can drag and drop a recipe row into a category. This allows you to quickly assign categories to a recipe without having to open up the recipe itself.
Suggesting Categories Premium
Paprika can suggest categories for a recipe based on its contents. While editing a recipe, click the wand button in the Categories row. Paprika adds up to five categories to the recipe, using your existing categories where they fit. Review them before you save, and remove any you don't want.
Two settings in the Recipes group of the General tab in the Settings window control suggestions:
Auto-Suggest Categories- Suggests categories automatically when you add a recipe from the browser, the clipboard, or a scan. Off by default.Suggest New Categories- Lets suggestions include categories you don't have yet. Turn it off to use only your existing categories. On by default.
The wand button works whether or not Auto-Suggest Categories is turned on.
Adding a Category
You can add a category by pressing the button in the categories toolbar.
Optional To create a subcategory, first select the parent category and then press the button. A new subcategory will be added to the parent category. You can also drag-and-drop to move categories into and out of subcategories.
Editing Categories
To edit a category, simply click once to select it, wait a moment, then click again to edit. If you would like to delete the category, highlight it and press the key on your keyboard, or right-click the category and press .
You can also drag and drop to rearrange the category order. First click the button above the categories and choose Custom. When it's set to Name, the default, categories stay in alphabetical order.
Built-In Categories
There are several built-in categories. These categories cannot be removed and provide special ways to view your recipes:
| Category | Description |
|---|---|
| All Recipes | Lists all of the recipes in your collection in alphabetical order. |
| Most Recent | Sorts your recipes by the date they were added, with the most recent recipes near the top. |
| Top Rated | Lists all of the recipes in order from highest star rating to lowest. |
| Favorites | List all recipes that you have added to your favorites. |
| Uncategorized | Lists all of the recipes that have not been assigned to a category. |
| Trash | Lists all of the recipes that have been marked for deletion. They cannot be opened or edited. Emptying the trash will permanently delete these recipes. |
Cookbooks
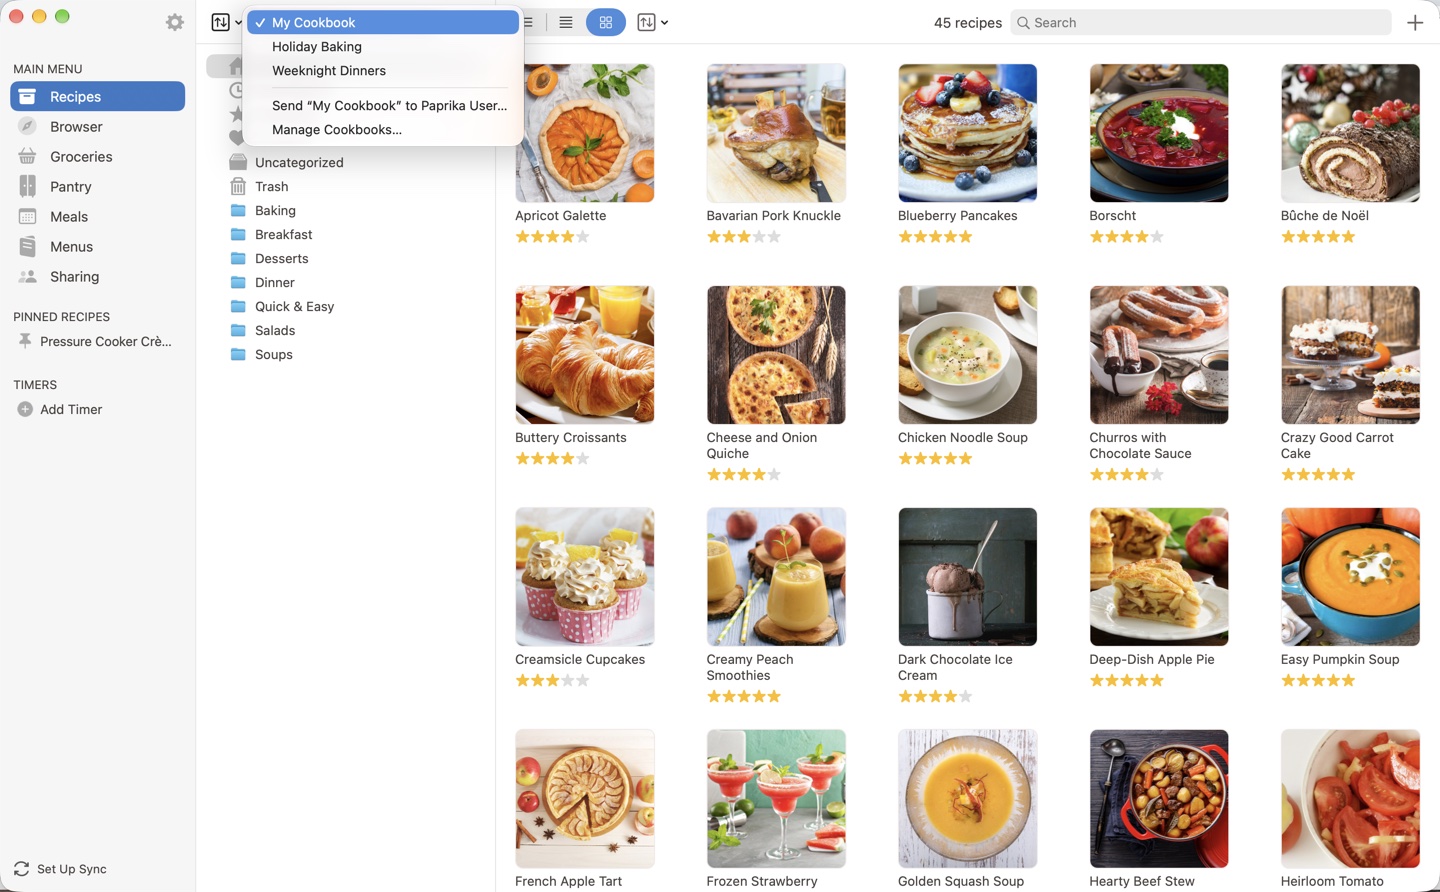
- Cookbooks, the current one ticked Switching Cookbooks
- Send a cookbook Sharing a Cookbook
- Manage Cookbooks Managing Cookbooks
Paprika 4 allows you to organize your recipes into multiple cookbooks. Each cookbook is a separate collection with its own recipes and categories. You might use one cookbook for everyday cooking, another for baking, and a third for recipes you're still planning to try.
Every account starts with a single cookbook named My Cookbook. If you never create another cookbook, Paprika works just like it always has. Your default cookbook cannot be deleted.
Note
Cookbooks are synced with your Paprika account, so your cookbooks will appear on all of your devices.
Switching Cookbooks
The name of the current cookbook is displayed at the top of the categories pane on the recipes screen. Click it to reveal the cookbook switcher, which lists all of your cookbooks with a checkmark next to the current one. Select the cookbook you would like to view. The recipes list and categories apply to the currently selected cookbook. A search starts there too, but you can widen it to other cookbooks.
Adding a Cookbook Premium
To create a new cookbook, choose Manage Cookbooks… from the cookbook switcher, then press the button in the upper right corner of the Cookbooks dialog. Enter a name for your new cookbook.
Managing Cookbooks
Choose Manage Cookbooks… from the cookbook switcher to open the Cookbooks dialog, which lists all of your cookbooks. Use the sort control in the upper left corner to change how the list is ordered. You can also switch cookbooks from here: select a cookbook and press .
Right-click a cookbook in the list to reveal its context menu, where you can choose Edit to rename the cookbook, Send to Paprika User… to send it to someone, or Delete to remove it. Paprika will ask you to confirm before deleting a cookbook.
When you delete a cookbook, Paprika asks what to do with the recipes inside it:
- Move to Trash - Moves the recipes to the Trash, where you can restore them until the Trash is emptied.
- Keep Recipes - Moves the recipes into your default cookbook, keeping their categories.
Choose Cancel to keep the cookbook.
Moving Recipes between Cookbooks
To move recipes into a different cookbook, select one (or more) recipes in the recipes list, then right-click and choose the destination from the Cookbook submenu. The cookbook the recipes are in now has a check mark beside it. You can also change a recipe's cookbook with the cookbook popup when editing the recipe.
If the recipes have categories that the destination cookbook doesn't, Paprika asks whether to bring them along. creates the missing categories in the destination cookbook, and moves the recipes without their categories. Paprika doesn't ask when the recipes are uncategorized or the destination already has all their categories.
Sharing a Cookbook Premium
You can send a copy of an entire cookbook to another Paprika user as an in-app message. To send the current cookbook, choose Send “…” to Paprika User… (it shows the cookbook's name) from the cookbook switcher. To send a different cookbook, choose Manage Cookbooks… from the cookbook switcher, right-click the cookbook you would like to share, and choose Send to Paprika User….
The recipient finds the cookbook in their messages on the screen and can import a copy of its recipes and categories. Changes you make later are not sent. See Sending Recipes & Cookbooks for details.
Note
If you are part of a family account, your family members share your recipe collection automatically — you don't need to share cookbooks with them individually.
Browser
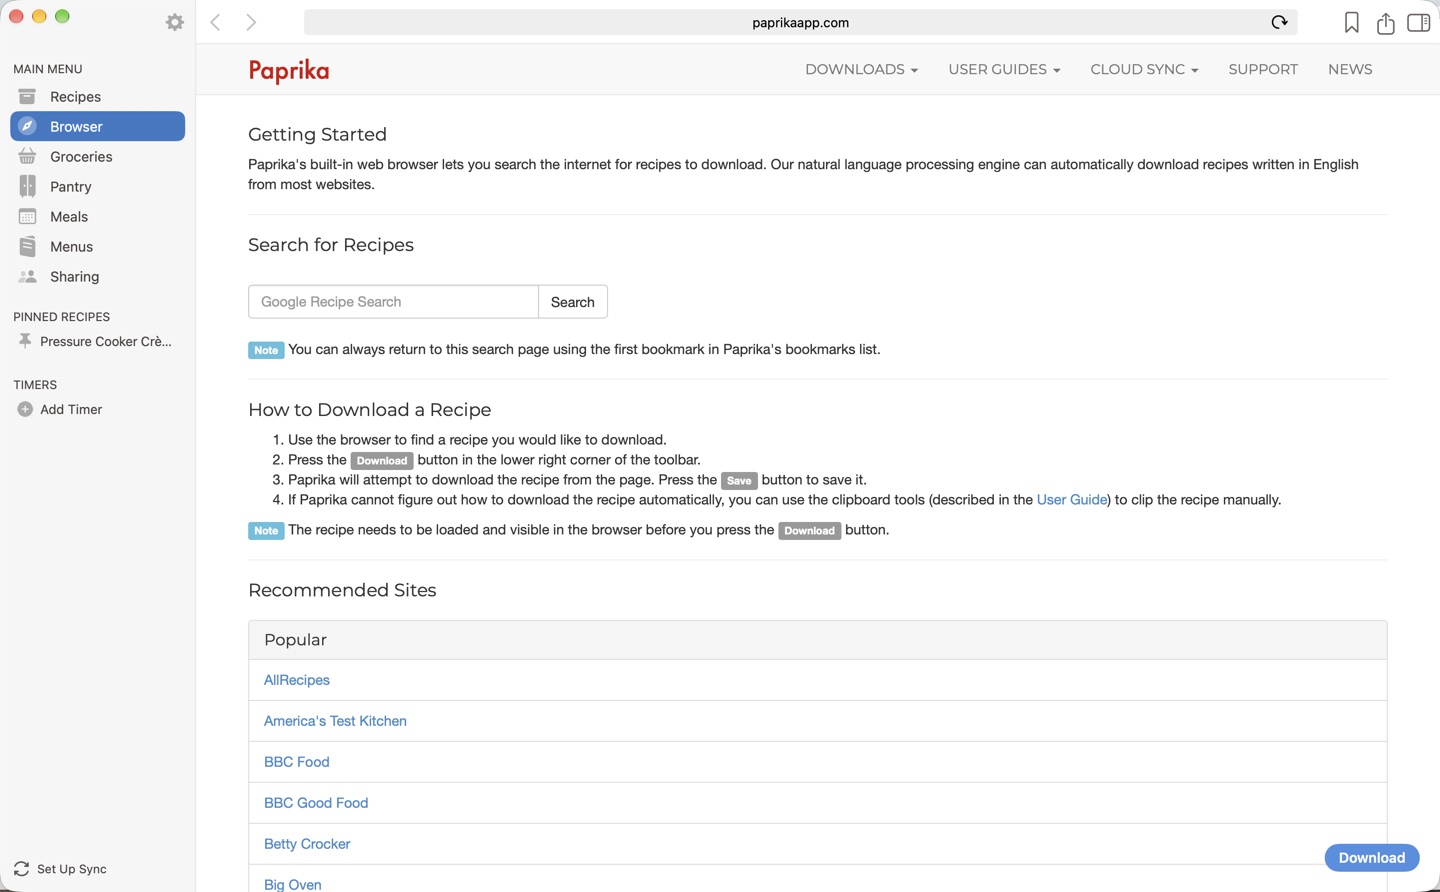
- Back and forward Using the Browser
- Address bar Using the Browser
- Bookmarks button Using the Browser
- button Clipping Recipes Online
- Recipe pane toggle Manually Saving Recipes Using the Clipboard Tools
Paprika's built in web browser lets you easily search the internet for your favorite recipes and save recipes from many different websites.
Using the Browser
The upper toolbar contains back and forward buttons, a combined address bar and search bar, and buttons on the right for bookmarking the current page, sharing, and toggling the side panel.
Click on the address bar in the top toolbar and type a URL to navigate to that page (ex: paprikaapp.com), or type in a search term to perform a recipe search. (ex: beet salad). As you type, an autocomplete dropdown suggests matches from your recent pages and bookmarks.
Shortcut Press Command-L (File -> Open Location…) to quickly enter a URL.
The button lets you bookmark the current page and displays your current bookmarks. From there you can load a bookmark in the browser, edit a bookmark, and add new bookmarks to the list. You can also search and sort your bookmarks. Bookmarks sync with other cloud data. Note The bookmark labeled Paprika Home displays instructions on how to download recipes from the browser and a list of favorite sites to get you started.
Use the button in the toolbar to share the current page.
Clipping Recipes Online
Paprika supports clipping recipes from hundreds of different recipe sites. In order to clip a recipe:
Use the web browser to browse to a recipe you would like to save.
Press the floating button in the lower right corner of the page.
Paprika will attempt to clip the recipe from the page. Press the button to save it.
If Paprika cannot figure out how to clip the recipe, it will display an error message. You can then use the manual clipboard tools (described below) to clip the recipe manually.
Note
If you clip a recipe that appears to already be in your collection (matching name and source), Paprika will warn you before saving a duplicate.
Clipping Recipes from Social Media Premium
In addition to traditional recipe sites, Paprika can save recipes from social media posts, stories, and pages on sites such as TikTok, Instagram, Facebook, and YouTube. Paprika reads the recipe from the text of the post, including its caption or description, so posts on other sites may work too.
- Navigate to the post in Paprika's browser (or paste the post's link into the address bar).
- Press the button.
- Paprika will read the post's text and extract the recipe into structured ingredients and directions. Review the result, then press .
Manually Saving Recipes Using the Clipboard Tools
If Paprika wasn't able to clip the recipe for you, or only partially clipped the recipe, you can use the clipboard tools to manually copy/paste the recipe information from any website.
To use the clipboard tools:
First, find the name of the recipe on the website.
Use your mouse to highlight the name.
Right-click the selected text and choose
Copy to...>Name. The selected text will be copied into theNamefield.Repeat the same process with the
Ingredients,Directions, and any other fields you would like to capture (Notes,Nutrition, orDescription).To save an image, right-click on it, then select from the menu that appears. The same menu also lets you choose
Replace Main Photo,Copy Photo to Clipboard, orSave Photo.When you've copied all the fields you would like to save, press the button at the bottom of the recipe panel to transfer all of your copied information into a new recipe.
Tips
- You can use the button, next to , in order to clear your copied selections and try again.
- You can review and freely edit the text you have captured into each field before saving.
- If text already exists in a field when you capture a new selection, the current selection will be appended to the existing text.
Groceries
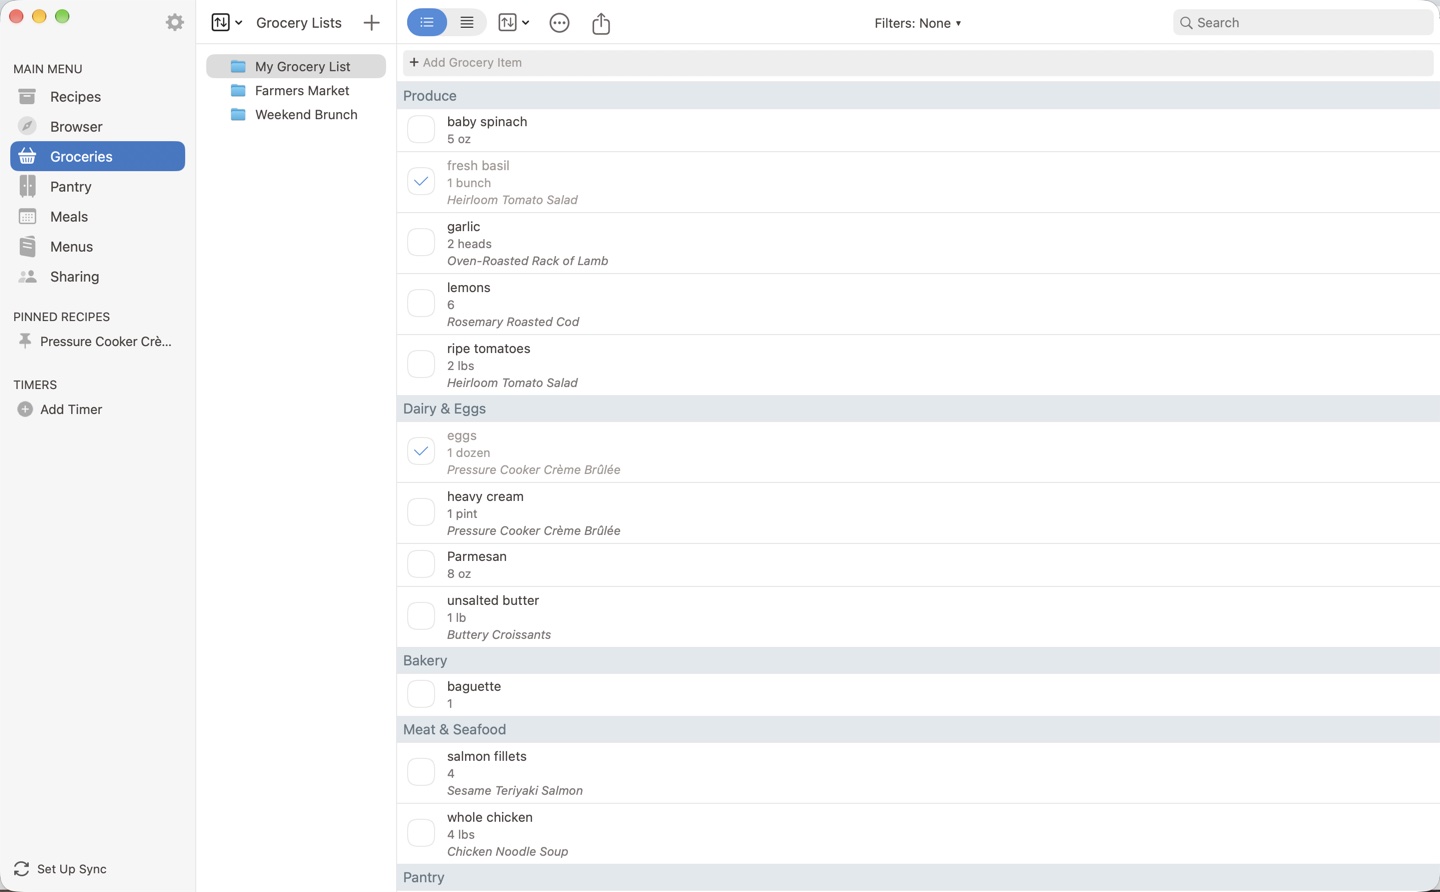
- Add grocery item Adding a Custom Item to the Grocery List
- Purchased item Marking Items as Purchased
- Filters Filtering Grocery List Items
- Search Searching the Grocery List
- button Sorting the Grocery List
- Grocery lists Viewing your Grocery Lists
- above the lists Adding a New Grocery List
- Actions menu Grocery List Actions
Paprika's grocery list makes it easy to shop for your recipes. You can make multiple grocery lists, add entire recipes to your grocery list, as well as your own custom grocery items.
The grocery list will automatically attempt to consolidate similar items with one another. For example, if one recipe calls for 2 eggs, and another recipe calls for 3 eggs, the consolidated listing will display 5 eggs total.
Consolidated items will be displayed with a ⊕ symbol next to the quantity.
Note
You can turn off the grocery list consolidation feature in the Settings panel if you do not find it useful.
Adding Ingredients
Adding a Recipe to the Grocery List
To add an entire recipe to the grocery list, open the recipe and press the button in the toolbar.
An ingredients pane will pop up displaying that recipe's ingredient list. Here you can check/uncheck ingredients before they are added to the grocery list.
(For example, if you already have salt at home, you can uncheck it before adding the recipe to the grocery list.)
Note
Ingredients you have in stock in your Pantry will be automatically unchecked for you. Paprika also takes the quantity recorded in your pantry into account, so if a recipe needs more of an ingredient than you have on hand, it will stay checked. Pantry items that have expired also stay checked.
Once you have the correct ingredients checked, press the button to add those ingredients to the grocery list.
Shortcut You can also add recipes to the grocery list from the main recipes listing, by right-clicking on a recipe and selecting .
Adding a Custom Item to the Grocery List
Custom items can be added to the grocery list by clicking the bar above the list and typing in the item.
If you are adding a common grocery item, the aisle will be automatically selected for you when you are done. You can also right-click on the item to set a specific aisle.
Shortcut You can paste multiple lines of text into the add field to create several grocery items at once — handy for copying a list out of an email or note.
Editing the Grocery List
Editing Grocery List Items
To edit a grocery list item, double-click on it. You can also right-click on the item if you want to change its aisle.
Removing Items from the Grocery List
You can remove individual items from the grocery list by highlighting them and pressing the button on your keyboard. You can also right-click on an item and select .
Note
You can delete multiple items at once by holding down Shift or Command and clicking to select multiple items.
Finally, you can clear the entire list using the action described below.
Using the Grocery List
Marking Items as Purchased
Mark an item as purchased simply by clicking within the checkbox. A checkmark will appear to indicate that the item has been purchased. You can mark the item as unpurchased by clicking it once more.
Filtering Grocery List Items
You can filter grocery items according to whether they are purchased or still to buy using the control in the toolbar.
You can also filter grocery items according to the recipe they belong to, or show only custom grocery items.
Searching the Grocery List
Use the search bar on the grocery list screen to quickly find an item in your list. The search matches item names and notes.
Sorting the Grocery List
By default, your grocery list will be sorted into aisles based on the type of ingredient. For example, milk will be placed into the Dairy aisle, and spinach will be placed under Produce.
If you prefer, you can change the grocery list to sort by recipe, by clicking the button in the toolbar and choosing Recipe instead.
Managing Multiple Grocery Lists
Paprika starts with one grocery list named My Grocery List. This list cannot be deleted, but it can be renamed. You can add additional grocery lists if you would like.
Viewing your Grocery Lists
All of your grocery lists are displayed in the Grocery Lists pane on the left. Click on a grocery list to select it.
Adding a New Grocery List
Press the button in the grocery lists toolbar to create a new grocery list.
Renaming a Grocery List
Right-click on a grocery list and select Edit to rename it, or click the cell to select it, then click again to edit it.
Grocery List Actions
You can access these actions by pressing the button in the toolbar.
| Action | Description |
|---|---|
| Clear Grocery List | Removes all items from your grocery list. You can choose between clearing all items, or only clearing purchased items. |
| Copy to Pantry | Copies items to the pantry, leaving them on the grocery list. You can choose between copying all items, purchased items, or the selected items. |
| Move to Pantry | Moves items from the grocery list into the pantry. You can choose between moving all items, purchased items, or the selected items. If you have multiple pantry locations, you'll be asked to choose a location. |
| Send an email containing the contents of the grocery list. | |
| Print out the grocery list. | |
| Export to Reminders | Exports your grocery list to Reminders. By default the Reminders list will be named Paprika, but this can be customized for each grocery list (right-click on the list and select Customize). |
To copy items to another grocery list, select them, right-click, and choose the list from the Copy to... submenu. To move them instead, choose the list from the List submenu.
Press the button in the toolbar to share the grocery list as plain text, with one item per line, so you can send it to any app.
Pantry
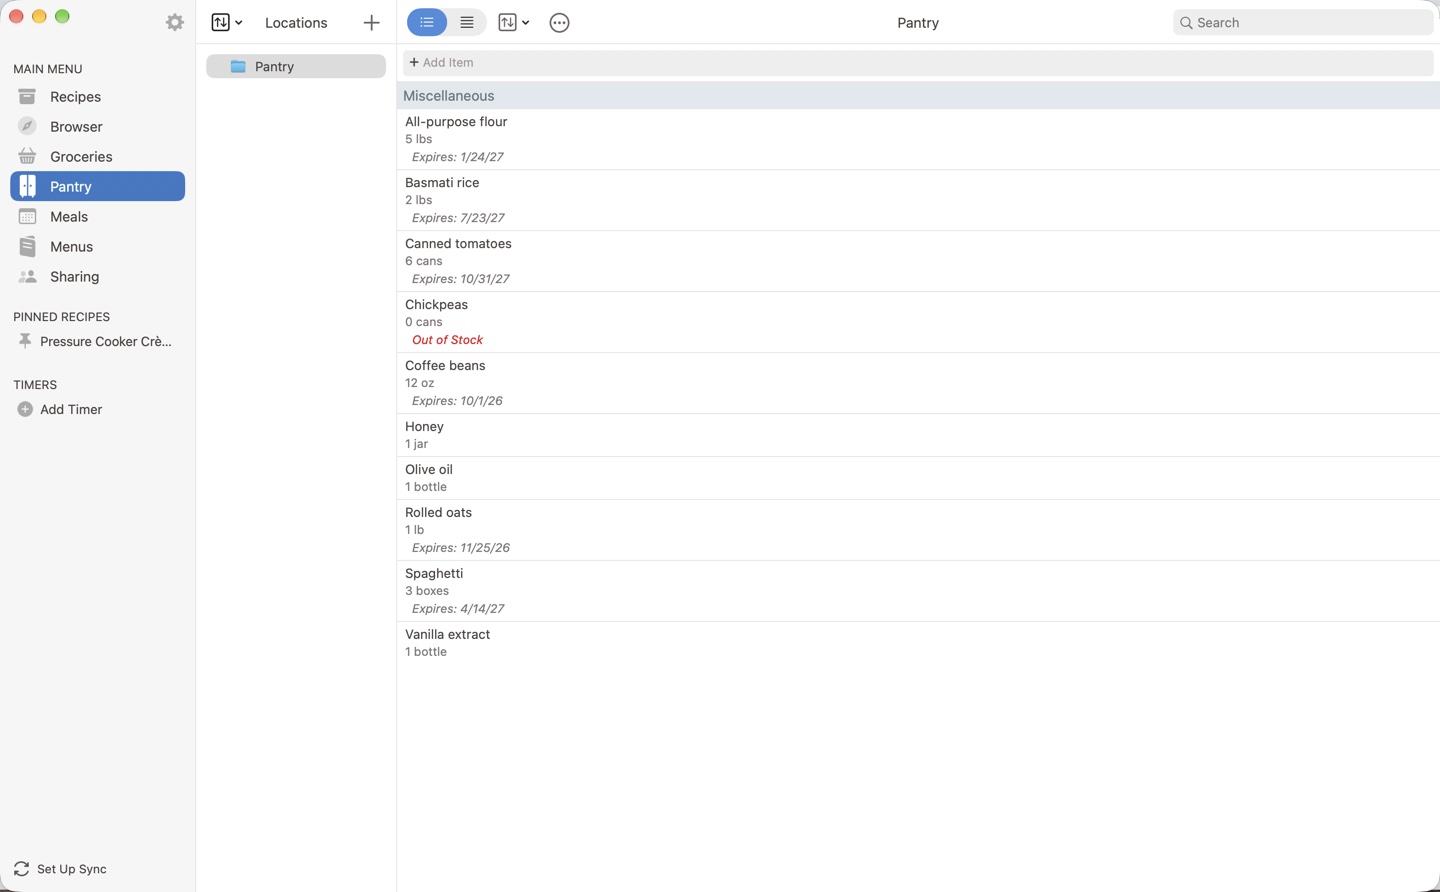
- Add Item Adding Items to the Pantry
- An item, out of stock Editing Pantry Items
- Locations Pantry Locations
- above the locations Pantry Locations
- button Sorting the Pantry
- Search Searching the Pantry
- Actions menu Pantry Actions
The pantry can be accessed by clicking the section in the main menu.
Use the pantry to keep track of common ingredients you already have at home, such as: salt, pepper, flour, sugar, etc.
For each pantry item you can record the quantity, purchase date, expiration date, a note, and whether it is in stock or out of stock.
Ingredients placed in your pantry will automatically be unchecked when you add recipes or meal plans to your grocery list.
Adding Items to the Pantry
To add an item to the pantry, click the bar above the list and type in the ingredient name, then hit Enter.
Shortcut You can paste multiple lines of text into the add field to create several pantry items at once.
Editing Pantry Items
Double-click on a pantry item to open the edit screen for that item. From here you'll be able to update the item's ingredient, aisle, location, quantity, purchase date, expiration date, and notes.
Note
The In Stock checkbox follows the quantity stepper: stepping the quantity down to zero marks the item out of stock, and stepping it up from zero marks it in stock again.
Pantry Locations Premium
You can organize your pantry into multiple locations, such as Pantry, Fridge, Freezer, or Spice Rack. Your locations are displayed in the Locations pane on the left — click on a location to view the items stored there.
To create a new location, press the button in the locations pane and enter a name. The default location cannot be deleted, but it can be renamed.
To move items to a different location, select one (or more) items, then right-click and choose Move to Location. You can also choose Copy to Location if you would like the item listed in more than one location.
Note
Pantry locations are synced across your devices.
Sorting the Pantry
By default, your pantry will be sorted into aisles, similar to the grocery list.
If you prefer, you can change the pantry sort order by tapping the button in the toolbar. You can choose between sorting by: Aisle, Date Added, Expiration Date, or In Stock.
Searching the Pantry
Use the search bar on the pantry screen to quickly find an item. The search matches item names and notes.
Pantry Actions
You can access these actions by pressing the button in the toolbar.
| Action | Description |
|---|---|
| Copy to Grocery List | Copies items from the pantry to the grocery list, leaving them in the pantry. You can choose between copying all items, expired items, out of stock items, or the selected items. |
| Move to Grocery List | Moves items from the pantry to the grocery list. You can choose between moving all items, expired items, out of stock items, or the selected items. |
Send an email containing the contents of the pantry, formatted as a table with Quantity, Ingredient, Notes, Out of Stock, and Expires columns. |
|
Print out the pantry as a table with Quantity, Ingredient, Notes, Out of Stock, and Expires columns. |
Meals
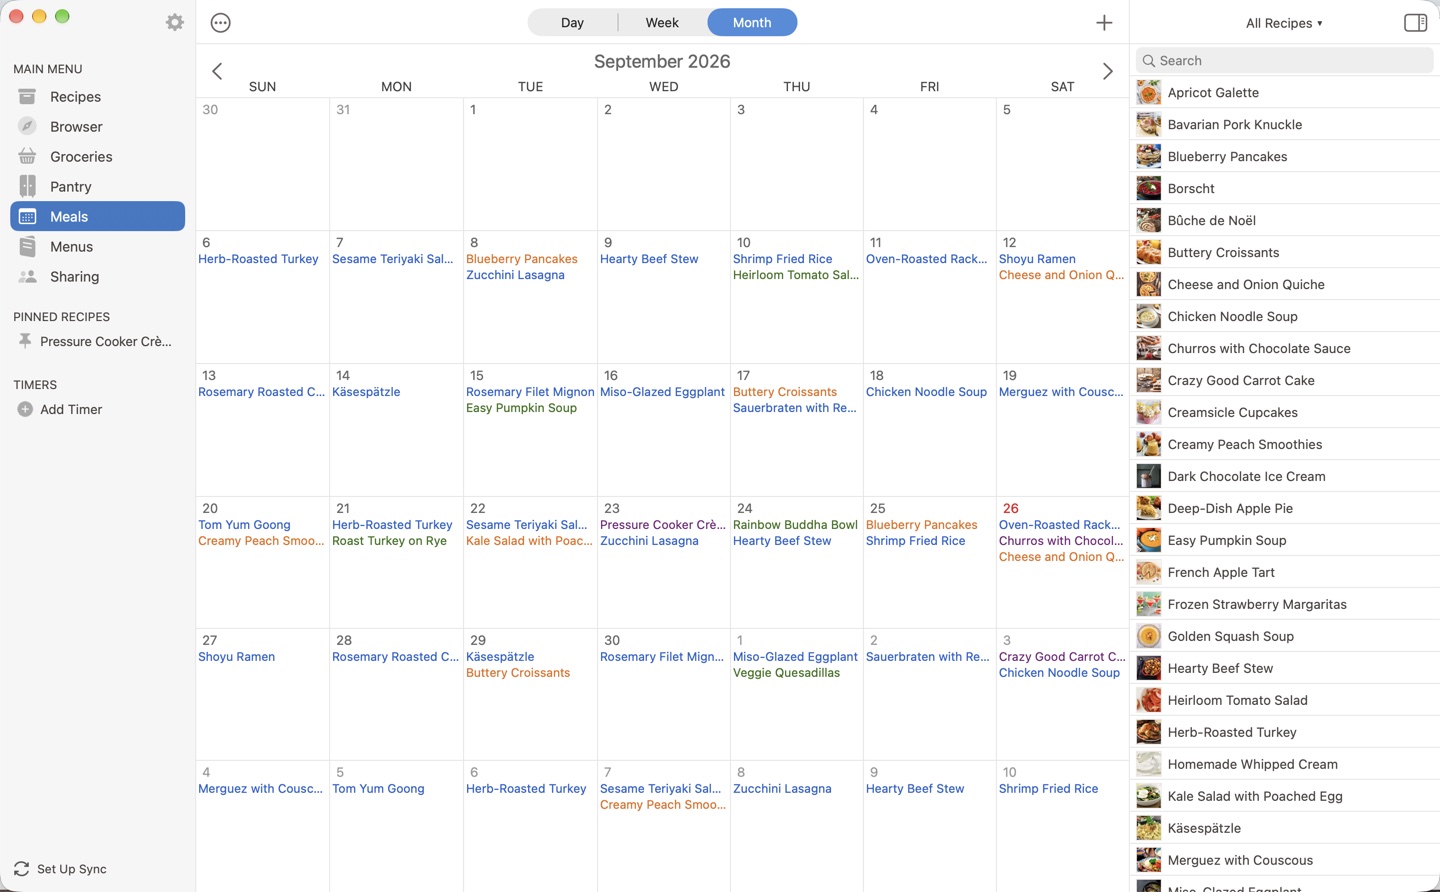
- Day, Week and Month Switching Views
- Previous and next month Monthly View
- button From the Meal Planner
- Recipes sidebar Drag and Drop from the Recipes Sidebar
- A planned meal Viewing Recipes from the Meal Planner
- Actions menu Meal Planner Actions
Paprika comes with a built-in meal planner that can be used to create weekly and monthly meal plans.
Viewing the Meal Planner
Switching Views
Use the view switcher at the top to switch between the daily, weekly and monthly views. Use whichever view you prefer most. The current day is highlighted in the calendar.
Monthly View
The monthly view shows an entire month's worth of meals at once. Use the and buttons to switch between months.
Weekly View
The weekly view displays a week's worth of meals at a time. To change the displayed week, press the and buttons to move forward or back a week.
You can also choose a specific week by clicking on the header for the current week, and using the calendar control to highlight a different week.
Daily View
The daily view shows the meals scheduled for the current day, sorted according to meal type.
Adding a Meal
Adding meals can be done from meal planner, or directly from the recipe screen.
From the Meal Planner
To add a meal from the planner, press the button.
- Choose
Add Recipe,Add Note,Add Menu(to add an entire menu), orAdd Ingredient. - Depending on your selection:
- Recipe - Choose a recipe.
- Note - Type in a note.
- Ingredient - Type in a plain ingredient (e.g.
leftover souporfruit salad) without needing a full recipe. - Menu - Select a menu.
- Choose a date for your meal.
- Choose the meal type (
Breakfast,Lunch,Dinner,Snack,etc.). - Press .
Drag and Drop from the Recipes Sidebar
You can also add meals by dragging and dropping them from the recipes panel on the right side of the meal planner.
Press the button to reveal the recipes panel if it is hidden.
Use the scope selector at the top of the panel (All Recipes by default) to browse a specific category, or type into its search field. Then simply find a recipe you like, and drag it onto the desired day.
If you have the Daily View selected, you'll be able to directly drag the meal into the desired meal type (Breakfast, Lunch, Dinner, Snack, etc.).
From the Recipe Screen
Open a recipe, and then press the button in the toolbar to add that recipe as a new meal.
Select the date for this meal, and then the meal type (Breakfast, Lunch, Dinner, Snacks, etc.), and then press .
Editing Meals
Changing a Meal's Date or Type
Double-click on a meal in order to edit an existing meal. Use the popup which appears to change the meal's date or type. You can also change the text of a note or ingredient, or the scale of a recipe. Press when you are done.
A meal's kind (recipe, note, or ingredient) and its recipe can't be changed once it has been added. To use a different recipe, delete the meal and add a new one.
Note
You can also right-click and select .
Deleting Meals
Select one (or more) meals, and right-click on them. Press from the popup menu to delete those meals. You can also press the Delete key on your keyboard.
Moving or Copying Meals
Meals can be moved around via drag-and-drop. If you would like to copy them instead of moving them, hold down Alt while you are dragging a meal.
You can also select one (or more) meals, and then right-click and press to copy them to the clipboard, and the right-click on the desired date in the calendar and press .
Scaling Meals
Each meal can have its own scale. When you add or edit a recipe meal, choose or type a value in the Scale field of the popup (for example 2, 1/2, or 50%) to adjust the recipe's ingredients for that meal — for example, doubling a recipe for guests. When you add scaled meals to the grocery list, the ingredient quantities will reflect the meal's scale.
Viewing Recipes from the Meal Planner
To navigate to a recipe from within the meal planner, double-click on the meal and then click the recipe name (blue link).
Meal Planner Actions
These actions are accessed by pressing the button in the toolbar.
For each action, you can choose whether you want to perform the action on the entire month or week, or only on the meals you have currently selected.
| Action | Description |
|---|---|
| Add to Grocery List | Add the ingredients for the currently selected meals to the grocery list. |
| Export to Calendar | Exports the currently selected meals to the Calendar. By default the exported calendar will be named Paprika, but this can be changed under Settings. |
| Email a meal plan for the currently selected meals. | |
| Print a meal plan from the currently selected meals. |
Calendar Feed Premium
A calendar feed shows your meal plan in Apple Calendar, Google Calendar, Outlook, or any other calendar app that can subscribe to a calendar by its link. Export to Calendar copies the meals once, but a feed keeps the calendar up to date as you plan, change, and delete meals in Paprika.
To set up a calendar feed:
- Open the Settings window, click the
Mealstab, and findCalendar Feed. - Click .
- Click to add the feed to the Calendar app. To use another calendar app, click and paste the link into that app's option for subscribing to a calendar by URL, such as
From URLin Google Calendar on the web.
The feed appears as a calendar named Paprika. Each meal appears at the time set for its meal type under Meal Types in Settings, or as an all-day event. The feed includes the meals from the past year and everything you've planned ahead. Your link is the same on all of your devices.
Note
Calendar apps check for changes on their own schedule, so a change can take a while to appear. Google Calendar can take up to a day to update.
Anyone with the link can see your meal plan. To stop a calendar from updating, return to Calendar Feed and click . Calendars subscribed to the link stop updating, and you can create a new link at any time.
Note
Creating a calendar feed requires a Paprika account. If your subscription ends, the feed keeps the meals planned up to that date but stops adding new ones.
Menus
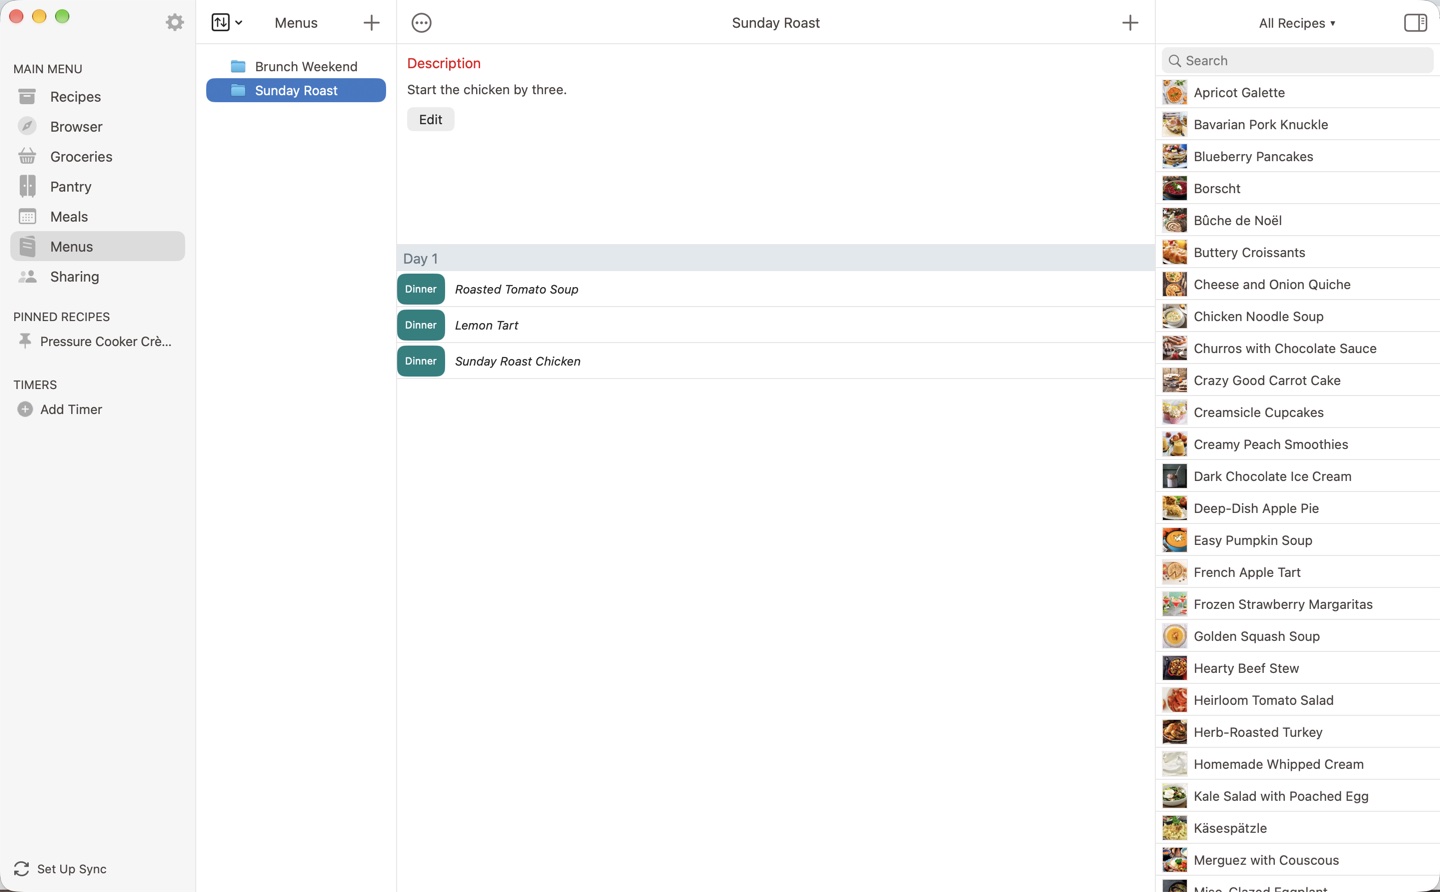
- Menus Adding a Menu
- above the menus Adding a Menu
- button Adding Menu Items
- Menu items, by day Adding Menu Items
- Recipes sidebar Drag and Drop
- Actions menu Menu Actions
The menus section allows you to group your favorite recipes into reusable menus. Menus are flexible and can be used for different purposes.
Planning a Specific Meal
If you want to plan a specific meal, such as a big dinner, you can create a menu for that dinner. Give it a name and description, then add the recipes you want to make. You can also add extra notes to the menu to record preparation tasks or other information.
Making a Weekly Meal Plan
You can add multiple days to each menu, allowing you to create reusable weekly meal plans. To do this, edit the menu and set the Number of Days to 7. The menu will contain 7 headings, Day 1 through Day 7, one for each day. You can then add a recipe Breakfast, Lunch, Dinner, etc. for each day.
Later, you can add this menu to the meal planner. You will be asked to choose the start day, and the rest of the days will be filled in with all of the recipes you previously added to the menu.
Adding a Menu
To add a new menu, press the button over the menus list and enter in a name. You can also enter an optional description. If you would like the menu to include more than one day, you can increase the number of days here.
Adding Menu Items
Select the menu you would like to view. Press the button in the upper right toolbar to add a new item to the menu. Like the meal planner, you can choose between adding a recipe, a note, or a plain ingredient.
If this menu has been configured with multiple days, then after you have chosen the recipe or typed in the note, you will also be prompted to choose which day to add this menu item to.
Note
Menu items can be scaled, just like meals. When you add or edit a recipe item, choose or type a value in the Scale field of the popup. The scale is preserved when the menu is added to the meal planner or to the grocery list.
Drag and Drop
You can also add recipes to a menu by dragging and dropping them from the recipes sidebar.
Press the button to show the recipes sidebar. Browse to a recipe you like, then tap and hold on that recipe and drag it into the menu. If you have multiple days set up in your menu, you can drop the recipe over the desired day.
Adding a Menu to the Meal Planner
Once a menu is created, it can be added to the meal planner. This is done from the meal planner section. Press the button in the meal planner, then select Add Menu. Choose the menu you would like to add, then choose the start day.
When you add a menu to the meal planner, all of the recipes and notes in that menu are added to the meal planner. If the menu contains multiple days, each day in the meal planner will be filled in with the contents of the corresponding day in the menu.
Menu Actions
These actions are accessed by pressing the button in the toolbar.
| Action | Description |
|---|---|
| Add to Grocery List | Add the ingredients for the current menu to the grocery list. |
| Emails the current menu. | |
| Prints the current menu. |
To make a copy of a menu, right-click it in the menus list and choose Duplicate, then enter a name for the copy. This is useful for creating a variation of an existing meal plan.
Sharing
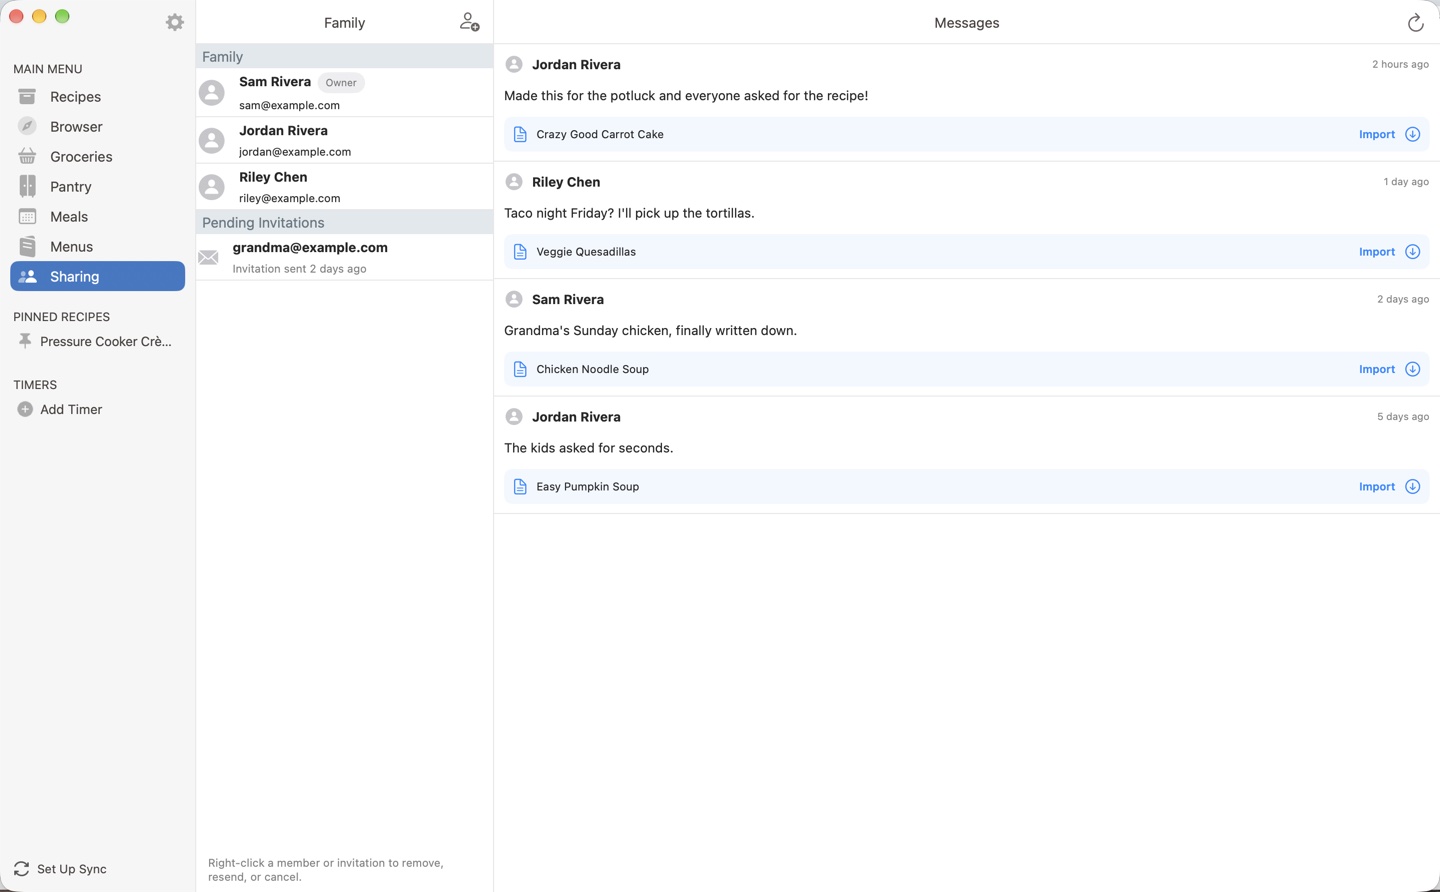
- Add member Inviting Family Members
- Family and invitations Managing Family Members
- Messages Messages
- button Receiving & Importing Recipes
Paprika 4 makes it easy to cook together. You can share your entire collection with the people in your household using family sharing, or send individual recipes and cookbooks to any Paprika user with in-app messages.
Both features live in the section in the main menu: your family is displayed in the Family pane on the left, and your messages are displayed on the right.
Family Sharing
Family sharing lets everyone in your household use the same Paprika account and recipe collection. Each family member gets their own login, and everyone's changes sync to the shared collection — so anyone can add a recipe, check off groceries at the store, or plan the week's meals.
The family owner manages the family and its subscription. Family members do not need to purchase their own subscription.
A family can have up to 5 members in total, including the owner.
Inviting Family Members Premium
To invite someone to your family, go to the section and press the invite button in the upper right corner of the Family pane. Enter the email address of the person you would like to invite.
The invited person will receive an email with a link for joining your family. The invitation is listed under Pending Invitations until they accept it. Once they accept, they'll appear in your family member list and can log in to your Paprika account with their own login.
Managing Family Members
The Family pane displays all of your family member accounts, along with a Pending Invitations group showing the status of any pending invitations. As the family owner, you can:
- Resend a pending invitation if it wasn't received.
- Cancel a pending invitation.
- Remove a family member from the family.
Note
Only the family owner can invite or remove members. Expired invitations are highlighted in red so you can easily resend them.
Messages Premium
You can send recipes — or entire cookbooks — directly to other Paprika users with in-app messages. It's the easiest way to pass along a favorite recipe to a friend who also uses Paprika.
Your messages are displayed on the right side of the screen, with a thumbnail for each recipe and indicators showing which messages have been read.
Note
You must be logged into a Paprika account to send in-app messages.
Sending Recipes & Cookbooks
To send a recipe, open it and choose Send to Paprika User… from the menu. You can also select one (or more) recipes in the recipes list, then right-click and choose Send to Paprika User…. Enter the recipient's Paprika account email address in the To field (you can add more than one), add an optional message, and press .
You can also send an entire cookbook. To send the current cookbook, choose Send “…” to Paprika User… (it shows the cookbook's name) from the cookbook switcher. To send a different cookbook, choose Manage Cookbooks… from the cookbook switcher, right-click the cookbook, and choose Send to Paprika User…. Recipients can import a copy of the cookbook's recipes and categories. Changes you make later are not sent.
Receiving & Importing Recipes
When someone sends you a recipe, it appears in your messages on the screen. Click the message to open the Import Recipes window, choose the recipes you want, then press to add them to your collection. Imported recipes are added to your default cookbook, and you can move them anywhere you like afterwards.
When someone sends you a cookbook, click the message and press to add a copy of the cookbook, with its recipes and categories, to your cookbooks. Later changes by the sender are not synced.
Push Notifications
Paprika can notify you when you receive a new message, even when the app isn't running. The first time you log in, Paprika will ask for permission to send you notifications. You can change this at any time in System Settings -> Notifications on your Mac.
Settings
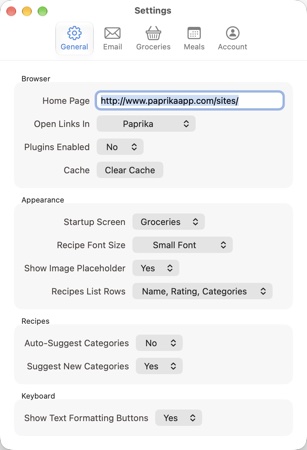
- Settings tabs List of Settings
- Account tab Account
- Browser settings List of Settings
- Appearance settings List of Settings
The settings window allows you to configure Paprika's default behavior.
It also provides access to your Paprika account and syncing. Paprika's import, export, and Find Duplicates tools live in the File menu — see Import Recipes, Export Recipes, and Find Duplicates below.
Accessing the Settings Panel
Paprika's settings can be accessed by navigating to Paprika -> Settings… in the menu bar (or pressing Command-,). You can also click the button at the top of the sidebar. The settings window is divided into five tabs: General, Email, Groceries, Meals, and Account.
List of Settings
| General - Browser | |
| Home Page | Can be used to set the default home page on the browser screen. |
| Open Links In | Choose whether links open in Paprika's built-in browser or in your default web browser. |
| Plugins Enabled | Whether or not web browser plugins are enabled. |
| Cache | Button to clear the web browser cache. |
| General - Appearance | |
| Startup Screen | Choose which section Paprika opens to when it launches. |
| Recipe Font Size | Adjusts the font size of the ingredients and directions on the recipe screen. |
| Show Image Placeholder | Shows a placeholder for recipes that do not have a photo. Otherwise the recipe name will be left aligned with no thumbnail. |
| Recipes List Rows | Choose which details (such as name, rating, and categories) are displayed for each recipe in the recipes list. |
| General - Recipes | |
| Auto-Suggest Categories | If turned on, Paprika suggests categories automatically when you add a recipe from the browser, the clipboard, or a scan. See Suggesting Categories. Requires Paprika 4 Premium. |
| Suggest New Categories | If turned on, category suggestions can include categories you don't have yet. Turn it off to use only your existing categories. Requires Paprika 4 Premium. |
| General - Keyboard | |
| Show Text Formatting Buttons | Whether the formatting toolbar is displayed while editing recipe text. Turn this off if you prefer to type the Markdown formatting yourself. |
| Default Recipient | Sets a default recipient in the To: field for any email messages. Note You can enter multiple recipients by separating them with commas. |
| Send Email With |
Which service to use to email recipes, grocery lists, etc.: macOS Mail app, SMTP Server, or
Gmail. By default Paprika uses the macOS Mail app, which requires an email account configured in Mail.
Alternatively, you can configure an SMTP server manually, or choose Gmail and click
Set Up Account to sign in with your Google account.
|
| Groceries | |
| Consolidate Ingredients |
If turned on, the grocery list will attempt to consolidate similar items with one another. For example,
if one recipe calls for 2 eggs, and another recipe calls for 3 eggs, the consolidated
listing will display 5 eggs total. If turned off, the grocery list will display each item
individually.
|
| Show Recipe Names | If turned on, the recipe name will display in the grocery list underneath the ingredient and quantity. |
| Aisles | Click Customize to change and reorder the grocery list aisles. You can add new aisles, delete aisles, and rename them. |
| Meals | |
| Week Starts On | First day of the week. Used when displaying a week of meals or selecting a date for a meal. |
| Meal Types | Click Customize... to add, remove, change and reorder the existing meal types. You can also associate a color and a time with each meal type. |
| Calendar Export Options | Allows you to configure the name of the exported Calendar and the time zone used for exported meals. |
| Calendar Feed | Creates a link that calendar apps can subscribe to, so your meal plan appears in them and stays up to date. See Calendar Feed. Requires Paprika 4 Premium. |
The Account tab is described under Account below.
Account
The Account tab of the settings window (called Cloud Sync in earlier versions) is where you create or log into your Paprika account, manage your account details, and control syncing.
Paprika Cloud Sync
Paprika Cloud Sync is an automated backup and syncing service for your recipe collection. It will automatically upload your recipes, cookbooks, categories, grocery lists, pantry, meals, and other data to our cloud servers, ensuring your data is safely backed up.
If you have Paprika installed on multiple devices, you can also use Paprika Cloud Sync to keep your data synced across all of those devices.
Note
Paprika Cloud Sync does not use iCloud. Instead, you will need to create a separate Paprika account as described below. Syncing will not be enabled until you set up a Paprika account.
Note
Paprika Cloud Sync isn't available in the free version. It's included for Paprika 3 owners and with Paprika 4 Premium.
Accessing your Account
Your account can be accessed via the Account tab of the Settings window. Your account email and last-synced time are also displayed at the bottom of the sidebar.
Creating an Account
You'll create one Paprika account for all devices sharing the same recipe collection. You can do this through the settings pane of any version of Paprika, and then log in to that same account on all other versions of Paprika.
To create an account, open the Settings window, and then select the tab. Then select .
Enter in your name, and the email address and password you would like to use for this account.
Note
If you already have an account, please login to that account instead of creating a new one. Recipes synced with an existing account will not be available under a new account.
Logging In
If you already have an account, you can log back into it using the button on the account screen.
Managing your Account
After logging in, you can manage your account and sync status from the Account settings pane.
| Account Status | |
| Name | The name associated with the account. |
| The email address associated with the account. | |
| Sync Status | |
| Last Synced | The date of the last successful sync attempt. |
| Status |
The result of the last sync attempt. This will say Success if you were able to successfully sync. If your
device was not able to connect to the sync server, the associated message will be displayed here.
|
| Sync Settings | |
| Update |
You can choose how often you would like to sync using the Update dropdown.
|
| Actions | |
| Log Out | Pressing this lets you log out of your account and cancels the sync, if running. |
| Manage Account |
A dropdown menu containing Change Name, Change Email, Change Password,
and Delete Account. Note Your name is shown to recipients
when you send in-app messages.
|
| Sync Now | Pressing this will initiate a new sync immediately. |
Quick Sync
If you are logged in, your account email and last-synced time are displayed at the bottom of the sidebar. Click the sync icon beside them to start a new sync. You can also choose Sync -> Sync Now in the menu bar, or press Command-Y.
If you aren't logged in, the bottom of the sidebar shows Set Up Sync instead. Click it to open the Account tab of the settings window.
Deleting your Account
If you would like to permanently delete your Paprika account and all of the data associated with it, choose Delete Account from the dropdown in the Account tab. You will be asked to confirm before the deletion is processed.
Note
Account deletion is permanent. Your synced recipes, photos, and other data will be removed from our servers and cannot be recovered. If you would like to keep a copy of your recipes, export them first.
Import Recipes
Paprika can import recipe databases from several other applications. To perform an import:
- Go to
File -> Import…in the menu bar. - Select the file to be imported. Paprika chooses the
Formatat the bottom of the window from the file's extension. If more than one format uses that extension, such as.zip, choose the format yourself. - Choose the
Cookbookfor the imported recipes. It starts with the cookbook you're viewing. For a Paprika file,Import cookbooks from fileis turned on at first, and puts each recipe into the cookbook it was exported from instead. - Click , then click to confirm.
When the import finishes, Paprika reports how many recipes were imported and how many existing recipes were updated.
Note
When importing a Paprika export file, recipes that already exist in your collection are updated rather than duplicated — and if a matching recipe is in your trash, it will be restored.
The currently supported file types are:
| Supported File Types | |
| .paprikarecipe & .paprikarecipes | Paprika's emailed recipe format and its export format. |
| .ysr | YummySoup! export format. |
| .mgourmet, .mgourmet3, & .mgourmet4 | MacGourmet export format. |
| .mx2, .mxp & .mz2 | MasterCook export formats. |
| .mmf | MealMaster export format. |
| .fdx & .fdxz | Living Cookbook export formats. |
| .yml & .yaml | A plain YAML file. See below for more details on this format. |
| .dvo | Cook'n export format. |
| .txt | The Recipe Manager export format. |
| .mcb | My CookBook export format. |
| .db & .zip | Pepperplate database file. Click here for instructions on how to get your database file from Pepperplate. |
| .hcb | Handy CookBook export format. |
| .sqlite | My Recipe Book database file. |
| .rbox | The Recipe Box export file. |
| .zip | Copy Me That export file. |
| .xml | Yum export file. |
YAML Format
YAML is a simple, plain text file with sections delimited by key-value pairs. To indicate a block of text, use an initial pipe character, as shown in directions and ingredients. Consistent indenting should be used, but the order of the fields does not matter, and most are optional with the exception of the name, ingredients and directions. It is recommended that you use an online YAML validator such as this one to validate your file if you're experiencing difficulties importing.
Note
The YAML format is quite strict with regards to whitespace and indentation. Please also make sure your file is saved with a UTF-8 encoding.
YAML recipe example:
name: My Tasty Recipe
servings: 4-6 servings
source: Food Network
source_url: http://www.google.com
prep_time: 10 min
cook_time: 30 min
on_favorites: yes
categories: [Dinner, Holiday]
nutritional_info: 500 calories
difficulty: Easy
rating: 5
notes: |
  This is delicious!!!
photo: (base-64 encoded image)
ingredients: |
  1/2 lb meat
  1/2 lb vegetables
  salt
  pepper
  2 tbsp olive oil
  4 cups flour
directions: |
  Mix things together.
  Eat.
  Tasty.
  Yum yum yum.
YAML multiple recipes example:
- name: My Tasty Recipe
  servings: 4-6 servings
  source: Food Network
  source_url: http://www.google.com
  prep_time: 10 min
  cook_time: 30 min
  nutritional_info: 500 calories
  on_favorites: yes
  categories: [Dinner, Holiday]
  difficulty: Easy
  rating: 5
  notes: |
    This is delicious!!!
  ingredients: |
    1/2 lb meat
    1/2 lb vegetables
    salt
    pepper
    2 tbsp olive oil
    4 cups flour
  directions: |
    Mix things together.
    Eat.
    Tasty.
    Yum yum yum.

- name: My Tasty Recipe 2
  servings: 4-6 servings
  source: Food Network
  source_url: http://www.google.com
  prep_time: 10 min
  cook_time: 30 min
  nutritional_info: 500 calories
  difficulty: Easy
  rating: 5
  photo: | (base-64 encoded image)
  notes: |
    This is delicious!!!
  ingredients: |
    1/2 lb meat
    1/2 lb vegetables
    salt
    pepper
    2 tbsp olive oil
    4 cups flour
  directions: |
    Mix things together.
    Eat.
    Tasty.
    Yum yum yum.
Export Recipes
Paprika currently offers two different export formats:
| Export Formats | |
| HTML |
A standard portable data format that allows you to preserve a copy of your recipe collection. Your recipes
will be exported to a directory, with an individual HTML file for each recipe, and an index.html
displaying the list of exported recipes. Each recipe file will contain
hrecipe metadata in the HTML.
|
| .paprikarecipes | Paprika's bulk recipe export format. These files can be easily imported into any copy of Paprika. |
How to export your recipes
- Go to
File -> Export…in the menu bar. - Select the destination folder you would like the export to be saved to.
- Choose the cookbook to export under
Cookbook, orAll Cookbooks. It starts with the cookbook you're viewing. To export a single category instead ofAll Recipes, click the button besideCategoriesand choose one. - Choose either
HTMLorPaprika Recipe FormatunderFormat. - Press .
Note
Cookbooks round-trip through export and import: a Paprika Recipe Format file remembers each recipe's cookbook. When you import it with Import cookbooks from file turned on, each recipe goes back into its cookbook, which is created if the account doesn't have it yet.
Find Duplicates
Over the years, it's easy to end up with the same recipe saved more than once. The Find Duplicates tool helps you clean these up. To open it, go to File -> Find Duplicates… in the menu bar.
Under Match Recipes By, select the fields you would like to match: Name, Source, Source URL, Ingredients, and Directions. Only Name is selected at first. Recipes are considered duplicates when all selected fields match; capitals and accents don't matter. Click to find duplicate recipes. Paprika searches all of your cookbooks, and leaves out recipes in the Trash.
The matching recipes are displayed in groups, each headed by the recipe's name and its number of copies. In each group, the oldest copy is listed first and marked Keep. Use to select every copy except the one marked Keep, and review the selection. Then click the delete button, or press Delete, and confirm. The selected recipes are moved to the Trash. If you've selected every copy in a group, the confirmation warns you that no copy of that recipe will remain. Double-click a recipe to open it.
Extensions
Saving Recipes from Safari
Paprika's share extension allows you to easily save recipes directly from Safari. To use the extension, first browse to a recipe you would like to save in Safari. Then press the Share button in Safari's toolbar, and select Paprika Recipe Manager 4.
If you do not see Paprika Recipe Manager 4 in the share menu, click Edit Extensions and enable it first.
Note
The share extension also works with social media links — share a post from a site such as TikTok, Instagram, Facebook, or YouTube to Paprika and it will extract the recipe from the post's text. See Clipping Recipes from Social Media.
Shortcuts
Paprika supports the Shortcuts app on macOS, so you can automate common tasks and run them from Shortcuts or with Siri. Available actions are Add to Grocery List, Add to Pantry, Show Meal (today's meals for a meal type), Export Grocery List, Open Recipe, Open Link (opens a link in Paprika's browser), and Launch Paprika (opens Paprika to a specific screen). You can also search your recipes from Shortcuts.
Resources
Technical Support
For technical support inquiries, please submit a new ticket through our support page.
Frequently Asked Questions
For answers to frequently asked questions, please consult our knowledge base.
Changelog
For a list of changes in each version, please consult What's New.